REW Room Measurement Software Guide for Beginners
REW — Room EQ Wizard — is the free program that turns room correction from guesswork into engineering, and it is the single most important piece of software on my bench. It is also where most people stall, because the interface is dense, the first sweep is intimidating, and the documentation assumes you already speak the language. I have run thousands of sweeps in it across one fixed room, and this is the guide I would hand my past self: what REW does, how to get a clean first measurement, and how to read the curves without fooling yourself.
The thing to understand up front is that REW does not fix anything. It measures, analyzes, and generates correction filters — but applying those filters happens elsewhere, in your DSP or software EQ — for headphone listeners, the dedicated headphone EQ software guide covers the tools that work without any hardware DSP at all. REW is the eyes; the miniDSP or software EQ is the hands. If you have not yet read why measurement is non-negotiable, my room correction equalizer basics makes the case; this guide is about driving the tool itself.
What REW Actually Does
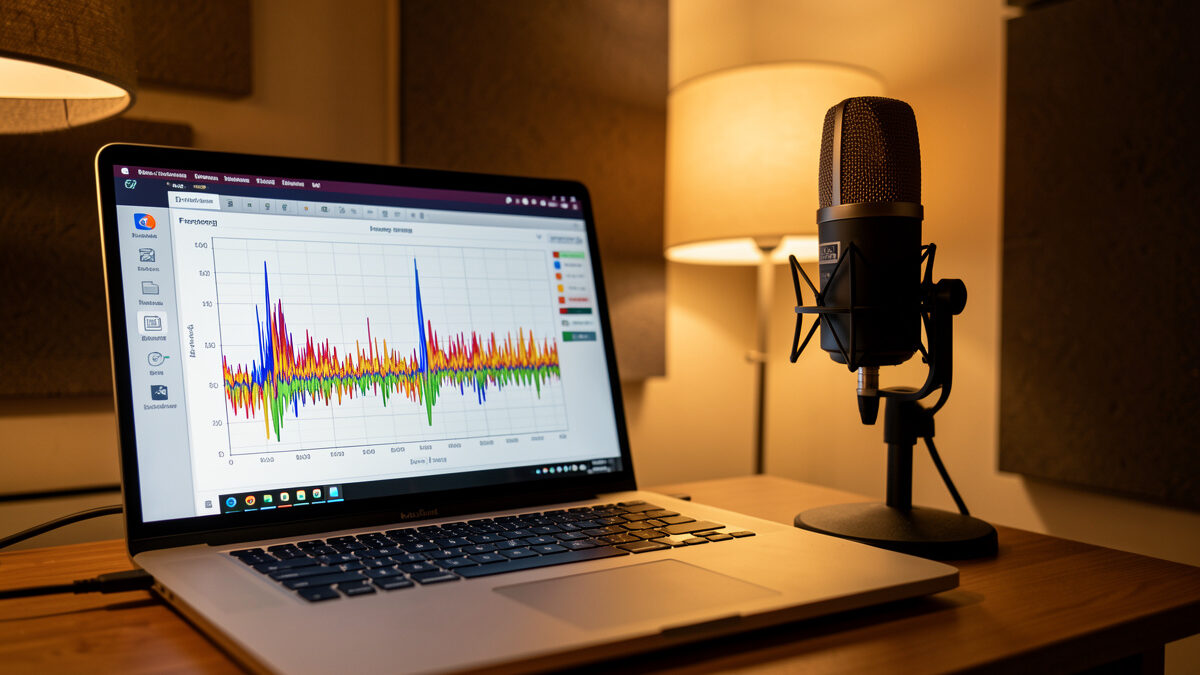
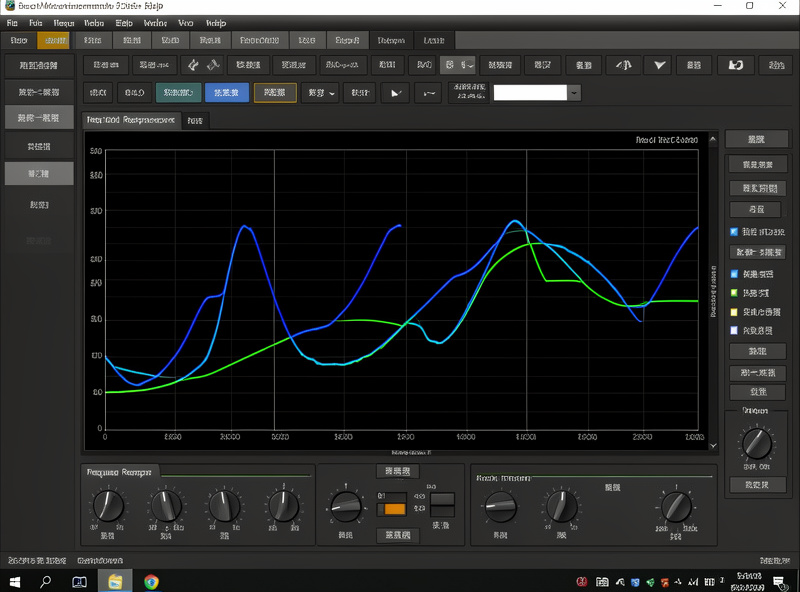
REW plays a frequency sweep through your speakers, records it through a calibrated microphone at your listening position, and computes how your room and speakers together respond at every frequency. From that single sweep it produces the frequency response (the level at each frequency), the waterfall and spectral decay (how long each frequency rings on after the signal stops), group delay (timing), and distortion data. It then lets you define a target curve and automatically generate the parametric filters needed to reach it — the exact frequency, gain, and Q values you transfer into your DSP.
That is an enormous amount of capability for a free program, and it has become the de facto standard for home room correction because it is genuinely excellent at it. The cost is a learning curve. You do not need every feature — for room correction you mostly live in three places: the measurement screen, the SPL & Phase graph, and the EQ window. Master those three and you have ninety percent of what REW is for.
What You Need to Run REW
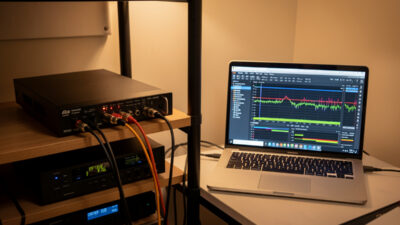
Two things beyond the free software. First, a calibrated USB measurement microphone. I use a UMIK-1 calibrated mic, which plugs straight into USB and ships with a unique calibration file that REW reads so the measurement reflects the room and not the mic’s own quirks. A capable budget alternative is the Dayton iMM-6 calibration mic, which connects through a phone or interface and gets you started for less. Either way, the calibration file is mandatory — measuring without it means correcting to a wrong baseline.
Disclosure: the links above are Amazon affiliate links; I may earn a small commission at no cost to you, and I only point you at gear I actually use. They are search links so they never go stale.
Second, a way to play REW’s sweep through your system. Over USB the UMIK-1 handles input; output goes through your normal playback chain so the sweep travels the same path your music does. Get a mic stand too — holding the mic by hand introduces movement and reflections off your body that corrupt the measurement. The mic belongs at ear height, at the listening position, pointed at the ceiling or straight ahead per the calibration file’s convention.
Taking Your First Clean Sweep
Load the microphone calibration file first — this is the step everyone forgets, and skipping it silently invalidates everything that follows. Set the mic at the main listening seat, ear height. In REW’s measurement dialog, choose a sweep that covers the full range, set a sensible level (loud enough to rise well above the room’s noise floor but not so loud it distorts), and run it. The sweep takes a few seconds and you will see the response appear.
Do not stop at one. Take several measurements moved slightly around the listening area — a small cluster around where your head actually sits — so you can work from a spatial average rather than a single point that may be misleading everywhere else. The average is what produces a correction that survives you leaning forward or shifting in the chair, which a single-point measurement does not. This spatial-averaging habit is the difference between an EQ that holds up in real listening and one that only works if you sit like a statue.
Reading the Curves Without Fooling Yourself
The frequency response is where you start, but read it correctly. Apply generous smoothing for judging tonal balance — raw, unsmoothed response below the modal region looks alarming and tempts you to over-correct. For identifying room modes, look at the response below your Schroeder frequency and find the peaks. Those are your correction targets. The nulls — the deep dips — are not targets; they are cancellations EQ cannot fill, and trying just clips your amp.
Then look at the waterfall or spectral decay plot, because the frequency response alone does not tell the whole story. The decay plot shows how long each frequency rings on after the signal stops, and a long-decaying low frequency is a room mode that physical treatment, not EQ, must address. This is the plot that tells you what bass traps would fix that EQ cannot — the two tools dividing the labor. If a frequency is both peaked and slow to decay, EQ tames the level but treatment is what actually shortens the ring.
Generating Correction Filters
Once you have a clean, averaged measurement, open the EQ window. Tell REW what processor you are targeting (it knows the constraints of common DSP units), set your target curve — a gentle downward house tilt, not a dead-flat line — and let it generate filters. Review what it proposes: I delete or reduce any filter asking for a large boost, because that means it is trying to fill a null, which never works. Keep the set lean and focused on the real modal peaks. Then export or transcribe those filter values into your DSP — for the hardware side, my miniDSP 2×4 setup guide walks through entering them — and re-measure to confirm the correction did what you intended.
That last re-measurement closes the loop. REW measures, you correct in the DSP, then REW measures again to verify. Skipping the verification sweep is how people convince themselves a correction worked when it actually introduced new problems. The whole value of REW is that it removes the guessing — so do not reintroduce guessing at the final step.
The REW Mistakes That Waste Everyone’s First Week
A handful of errors trip up nearly every newcomer, and all of them are avoidable once named. The first is forgetting the calibration file — the measurement looks plausible, so the mistake hides, but every filter you build on it is aimed at a baseline the mic invented. Always load it, always confirm REW shows it loaded.
The second is judging tonal balance from unsmoothed response. The raw curve below the modal region is a jagged mess of fine peaks and dips that mean little for how the room sounds; staring at it makes people pile on filters chasing noise. Apply variable or psychoacoustic smoothing when judging balance, and reserve the unsmoothed view for spotting genuine narrow modes.
The third is measuring too quietly. If the sweep is barely above the room’s background noise, the low-frequency data gets buried in noise and the measurement is unreliable exactly where you need it most. Run the sweep at a healthy level — well above the noise floor, short of distortion — so the bass data is clean.
The fourth is the single-point trap already mentioned: one measurement, one position, and a correction that falls apart the moment you move. The fifth is treating REW’s auto-generated filters as gospel. The software is good, but it does not know your room has an uncorrectable null at 38 Hz; it will happily propose a 10 dB boost to fill it. You are the editor — delete the boosts, keep the cuts, and re-measure. REW is a brilliant instrument, but it is still an instrument you have to play with judgment, not a vending machine that dispenses a finished correction.
Frequently Asked Questions
What is REW room measurement software?
REW, or Room EQ Wizard, is free software that plays a frequency sweep through your speakers, records it with a calibrated microphone at your seat, and shows exactly how your room and speakers respond. It produces frequency response, decay, and timing data, and can generate the parametric correction filters you load into a DSP. It is the de facto standard for home room correction.
Do I need a special microphone for REW?
Yes, a calibrated measurement microphone. A USB mic like the UMIK-1 plugs straight in and ships with a calibration file REW reads so the measurement reflects your room, not the mic. A budget option like the Dayton iMM-6 also works. The calibration file is mandatory; measuring without it corrects to a wrong baseline.
Is REW free?
Yes, REW is free to download and use. The only cost in a room-measurement setup is the calibrated microphone and a stand to hold it. That makes measured room correction one of the highest-value upgrades in home audio, since the software that makes it possible costs nothing.
How many measurements should I take in REW?
More than one. Take a small cluster of sweeps moved slightly around the listening area and work from the spatial average, rather than trusting a single point that may be misleading everywhere else you sit. The averaged measurement produces a correction that holds up when you shift in the chair instead of one that only works in a single frozen position.
Keep Building
REW is the measurement engine; the rest of the cluster is what you do with what it shows you. The home audio equalizer guide is the overview, parametric vs graphic EQ explains why the filters REW generates are parametric, and the miniDSP 2×4 setup guide covers loading them into hardware. For the decay problems the waterfall reveals, my room acoustics treatment guide is the physical fix.