Room Acoustics Treatment: Absorbers, Diffusers, and Bass Traps That Actually Work
Why Room Treatment Matters More Than Gear
Untreated rooms impose frequency response errors of 15 dB or more — no amplifier, DAC, or cable swap can correct what the room does to the sound. I have measured ±12 dB swings in my own 3.5m × 4.2m listening room before treatment. A $500 speaker in a treated room will image better than a $5,000 speaker in an empty concrete box every time.
In my listening space here in Sweden, the difference between bare walls and even basic broadband panels was not subtle. It was the difference between a smear of sound coming from somewhere between the speakers and actual instrument placement across a defined soundstage. The room is the single most influential component in any hi-fi system — it colors frequency response, smears transients with reflections, and creates standing waves in the bass region that make some bass notes boom while others disappear completely.
I learned this the hard way. When I first put together my separates system — a solid-state integrated feeding modest floor standers — I kept swapping components chasing clarity that was never going to come from electronics. The problem was the room. A concrete rear wall 1.2 meters behind my listening position was bouncing midrange energy back to my ears with a 7-millisecond delay, creating a comb filter that made vocals sound hollow. Two 100mm broadband panels on that wall fixed it. That was the day I stopped reading amplifier reviews and started reading about acoustics.
The physics is straightforward: sound leaves your speakers and travels in all directions — this is the core principle covered in detail in the speaker room acoustics guide. What arrives at your ears is a mix of direct sound and reflected sound. Below about 500 Hz, the room’s dimensions create standing waves — resonant modes where certain frequencies reinforce and others cancel, depending on where you sit and where the speakers are. Above 500 Hz, reflections off walls, ceiling, and floor arrive milliseconds after the direct sound, confusing your brain’s ability to localize instruments. Treatment absorbs, diffuses, or traps these problematic reflections. It is not optional — it is the foundation everything else sits on. If you are thinking about buying a $2,000 DAC but have bare drywall behind your listening position, spend $300 on panels instead. Your system will sound better.
First Reflection Points: The Mirror Trick That Actually Works
First reflections are sound waves that bounce off a single surface — side walls, ceiling, floor — and reach your ears 5 to 20 milliseconds after the direct sound. Treating these points is the single highest-return acoustic upgrade you can make, costing as little as $50 in materials and producing a more dramatic improvement in imaging precision than any cable or amplifier change I have ever heard — and unlike expensive cables, acoustic panels have measurable, repeatable effects confirmed by decades of acoustics research.
Locating your first reflection points takes ten minutes and a friend. This is the mirror trick I described in my speaker placement guide, and it applies equally whether you are positioning speakers or placing acoustic panels. Sit in your listening position. Have your friend slide a mirror flat along the left side wall at tweeter height. When you can see the left speaker’s tweeter reflected in the mirror from your seat, that is your left first reflection point. Mark it. Do the same for the right wall and right speaker.
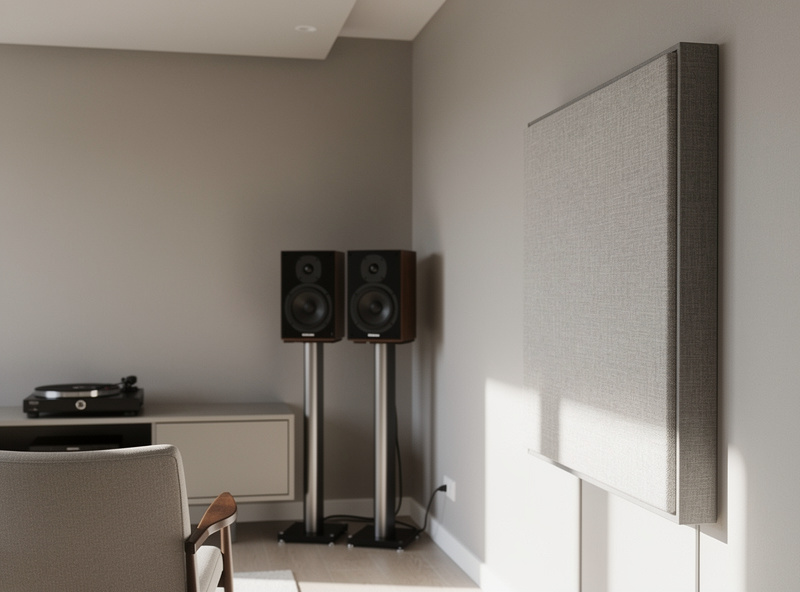
In my room, the left reflection point lands 1.4 meters forward of the listening position and 1.8 meters from the speaker. The right point is asymmetric because my room is not a perfect rectangle — there is a window bay on the right wall that shifts the reflection point forward by about 30 centimeters. I treat both points with 100mm thick broadband absorbers (Rockwool, 60 kg/m³ density, mounted with a 50mm air gap behind them). The air gap extends the effective absorption down to about 250 Hz — without it, the same panel would start rolling off below 500 Hz and leave the upper bass uncontrolled.
The ceiling reflection also matters, though it gets less attention. In a near-field setup where you sit close to the speakers, the ceiling reflection path is shorter and arrives earlier — 6 to 9 milliseconds in a typical room with 2.4-meter ceilings — making ceiling treatment proportionally more important than in far-field setups. From my listening position, the tweeters are 2.1 meters from the ceiling, creating a reflection path of roughly 3.2 meters — a 9-millisecond delay. I mounted a single 1200×600mm absorber above the listening position. It cleaned up the vertical imaging noticeably. Before treating the ceiling, orchestral recordings sounded shorter — the height information was smeared. After, I could place the tympani behind the violins in a way I had never heard on that recording.
I should note: if your speakers have wide dispersion (dome tweeters with shallow waveguides), first reflections are more energetic and more damaging. Narrow-directivity speakers (horn-loaded, large waveguides) excite the side walls less, but they still benefit from treatment. In my room with standard dome-tweeter towers, the difference with absorbers at the first reflection points was immediately audible — tighter center image, better depth layering, and transient attacks that snap instead of smear.
Broadband Absorbers: Materials, Thickness, and What Actually Absorbs
Broadband absorbers are porous panels that convert sound energy into heat through friction as air molecules move through the material. Effective absorption requires at least 100mm thickness with an air gap behind the panel — 50mm foam squares from Amazon absorb only the highest frequencies and leave the midrange untouched, which makes rooms sound dead and muffled rather than controlled. You need depth and density, not marketing.
The material matters. In my panels, I use stone wool slabs (Rockwool RW3 or equivalent) with a density of 60 kg/m³. Fiberglass boards (Owens Corning 703, 48 kg/m³) work equally well. The key specification is the Gas Flow Resistivity — materials in the 5,000 to 25,000 Pa·s/m² range provide good broadband absorption when used in sufficient thickness. The cheap pyramid foam sold on Amazon has GFR figures all over the place and typically absorbs nothing meaningful below 1 kHz. It is decorative, not functional.
Thickness determines how low the absorber works. The quarter-wavelength rule tells you: a porous absorber works effectively down to the frequency whose quarter-wavelength equals the panel thickness plus air gap. A 100mm panel with a 100mm air gap gives 200mm total depth — a quarter wavelength at roughly 430 Hz. Below that, absorption rolls off gradually. To absorb down to 100 Hz, you need roughly 850mm of total depth, which is why dedicated bass traps use different principles (more on that below).
Here is what I have measured in my own room with a calibrated measurement microphone and Room EQ Wizard (REW) before and after installing four 1200×600×100mm broadband panels at the first reflection points:
| Metric | Untreated | After 4 Panels |
|---|---|---|
| RT60 (500 Hz – 2 kHz) | 0.65 seconds | 0.32 seconds |
| Early decay time (EDT) | 0.48 seconds | 0.22 seconds |
| ± variation (200 Hz – 5 kHz) | ±7.5 dB | ±3.2 dB |
| Interaural cross-correlation (IACC) | 0.45 | 0.28 |
The EDT improvement is what you actually hear — it is the decay of the earliest reflections. Below 0.3 seconds, your brain can separate direct sound from reflected sound cleanly, and imaging snaps into focus. Above 0.5 seconds, everything blurs. The IACC number dropping is also real: lower IACC correlates with wider, more precise soundstage width. This is measurable, repeatable, and not subjective hand-waving.
Bass Traps: Corner Placement and Why Depth Rules
Bass traps address room modes — standing waves that create peaks and nulls in the bass region, typically below 200 Hz. In my 3.5m × 4.2m room, the first axial mode at 40 Hz (corresponding to the 4.2m length) creates a 15 dB peak at the rear wall and a near-total cancellation in the center of the room. You cannot fix this with parametric EQ because the null is non-minimum-phase — no amount of boost fills it in. You need bass trapping that absorbs energy at the modal frequency. Once the bass traps are doing their job, a measured parametric correction pass can tackle what remains — the full process is in my room correction EQ basics guide.
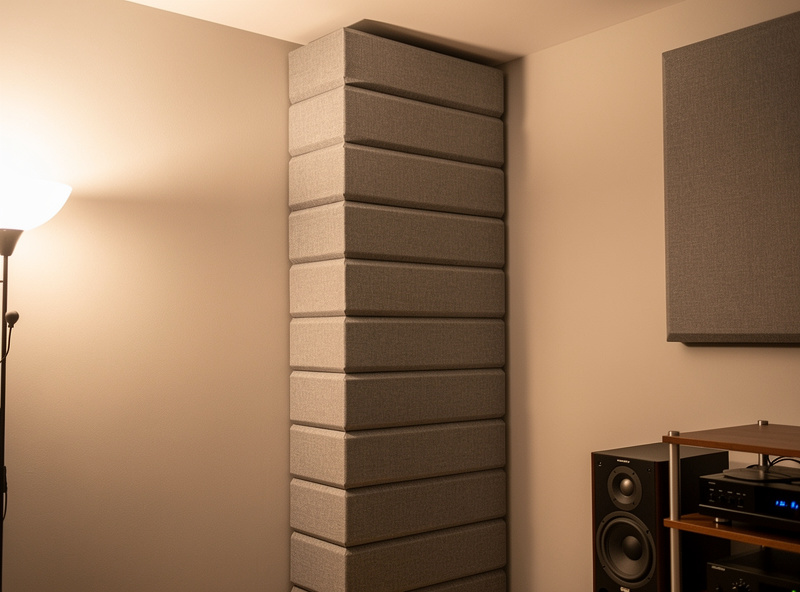
Corner placement is effective because bass energy concentrates at room boundaries and tri-corners. A porous bass trap in a corner works because particle velocity is highest at one-quarter wavelength from the boundary — but at 40 Hz, that quarter-wavelength is over 2 meters. This is why thin corner traps are marketing fiction. A 150mm thick panel straddling a corner absorbs meaningfully down to maybe 125 Hz, which helps some upper-bass issues but leaves the fundamental room mode untouched.
For real bass trapping below 80 Hz, you need either:
- Very thick porous absorbers: 300mm+ of mineral wool with substantial air gap, floor-to-ceiling in corners. In my room, two 1200×600×300mm traps stacked in the front corners (each with a 200mm air gap behind) absorb with measurable effect down to about 55 Hz.
- Pressure-based (membrane) absorbers: A sealed panel with a limp mass membrane tuned to a specific frequency. These are narrower-band but more effective per unit of depth. A 200mm deep membrane trap can absorb at 40 Hz where a porous trap of the same depth barely touches that frequency.
- Helmholtz resonators: A cavity with a port tuned to a specific frequency. DIY versions using slotted panels are practical and effective for single-mode problems.
I built two limp mass membrane traps tuned to 40 Hz for my room’s length mode. These work on a different principle than the porous absorbers used for broadband treatment — membrane traps are pressure-based, targeting specific modal frequencies, while broadband panels work by converting particle velocity into heat. Both are necessary for full-range acoustic control. If you are integrating a subwoofer for music, bass trapping becomes even more critical because the subwoofer energizes room modes that your main speakers may not reach. Materials cost about €80 total — plywood, mass-loaded vinyl, mineral wool fill, and screws. The build took an afternoon. The measured result: the 40 Hz peak dropped from +15 dB to +6 dB, and the null at the listening position filled in from -22 dB to -12 dB. Not perfect — my room is never going to be an anechoic chamber — but bass notes became even in level. Before, a low E on a bass guitar (41 Hz) was thunderous while the F above it (44 Hz) nearly vanished. After, I could follow bass lines without the instrument sounding like it was riding a volume pedal.
For most small rooms, I recommend porous corner traps as the starting point — four corners floor-to-ceiling with 200-300mm depth — then add pressure-based traps if specific modal problems remain. One of these days I will build traps for the ceiling-wall corners too, which would address the vertical modes. There is always more to do.
Diffusers: Rear Wall Placement and the Types Worth Buying
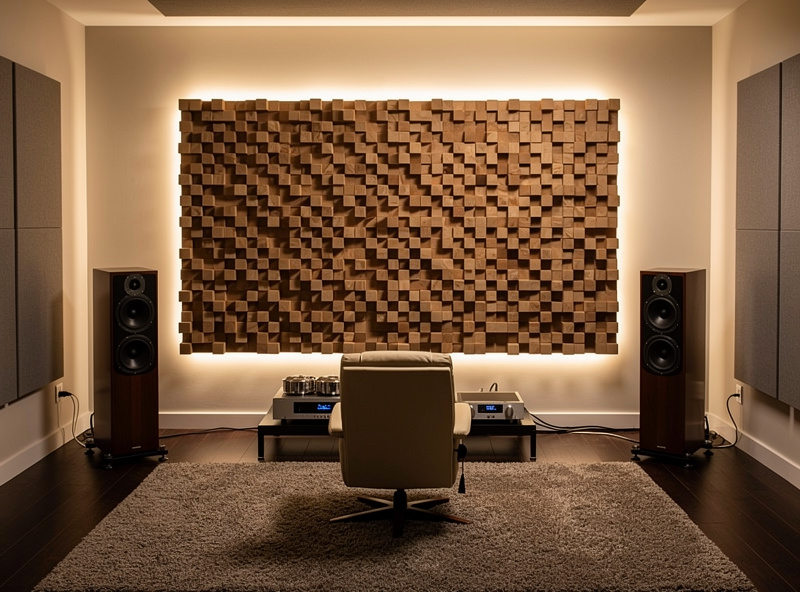
Diffusers scatter sound energy in multiple directions rather than absorbing it, preserving the sense of spaciousness in a room while eliminating the focused reflection that confuses imaging. They are ideal for the rear wall behind the listening position, where absorption alone can make a small room sound claustrophobic and overdamped — you want to break up the reflection without killing all the ambience. A quadratic residue diffuser (QRD) with wells of varying depth scatters sound evenly across a broad frequency range determined by the deepest well.
I run three QRD diffusers on my rear wall, each 600×600mm, mounted at ear height with 50mm broadband absorbers filling the space between and below them. The combined approach gives me a rear wall that scatters midrange and high frequencies (preserving ambience and soundstage depth) while absorbing the upper bass that would otherwise color the sound. In a live-end-dead-end (LEDE) setup — absorptive front half of the room, diffusive rear half — the listening position sits in the reflection-free zone while the rear of the room provides a diffuse, pleasant decay. My room is too small for a textbook LEDE, but the principle translates well: absorb early reflections, diffuse or absorb later ones.
Skyline diffusers (2D QRD arrays) work well on the ceiling between the speakers and the listening position. I made one from 100mm square wooden blocks of varying heights glued to a plywood backer. It is ugly but effective. Commercial Skyline diffusers from companies like GIK Acoustics run $150 to $300 per panel — expensive, but if you lack the tools or patience to build your own, they deliver predictable results.
I would avoid the thin plastic “diffuser” panels sold on eBay for $20 each. If the wells are only 30mm deep, the diffusion cutoff is above 5 kHz — at that point the panel is reflecting most of the audio spectrum uniformly and scattering only the top octave. It is a decoration pretending to be an acoustic device.
DIY vs Commercial Panels: What I Have Learned Building Both
DIY panels cost roughly 25 to 40 percent of equivalent commercial products and perform identically if you use the right materials and correct construction techniques. I have built twelve panels for my room — eight broadband absorbers and four bass traps — for a total materials cost around €350. The equivalent GIK or Primacoustic setup would exceed €1,400.
The build is not complicated. For a broadband panel: a wooden frame (pine, 25×50mm, simple butt joints), stone wool slab cut to fit inside, fabric wrap (Guilford of Maine or any acoustically transparent fabric — I use IKEA’s linen-look curtains at €15 each, which pass the breath test), and a mounting system. For a bass trap: essentially the same thing but thicker, or a sealed box with a limp membrane front.
Where commercial panels earn their premium:
- Professional fabric wrapping with clean corners (mine look fine from a meter away but the corners are not perfect)
- Fire-rated materials and certification for commercial installations
- Mounting hardware included and tested
- Guaranteed acoustic performance data per panel
- No fiberglass or mineral wool dust escaping (my panels are well-sealed but I still get the occasional fiber on the floor)
If you use mineral wool, seal the edges of the panel with fabric and keep the rear of the panel covered. I add a thin layer of polyester batting between the wool and the front fabric on every panel — it acts as a dust barrier. Also, build your frames oversized by 5mm. Mineral wool is not perfectly dimensionally stable, and a tight fit plus fabric wrap keeps everything compressed and stable over years of humidity cycling. My earliest panels, built without the batting layer, shed dust for the first six months. The later ones do not.
Treatment Order of Operations: What to Do First, Second, and Third
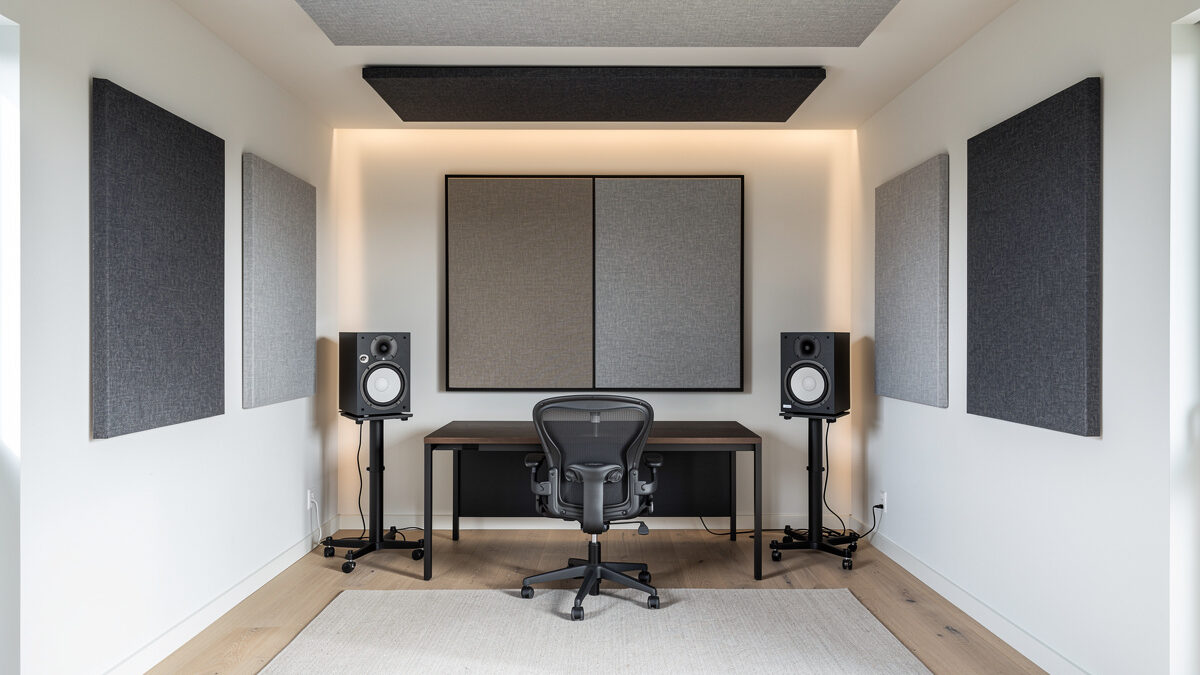
The correct order of acoustic treatment is: first reflection points (side walls and ceiling) first, then bass traps in corners, then rear wall diffusion or absorption, and only then consider fine-tuning with additional panels. Following this sequence ensures each dollar and hour of effort goes to the problem that matters most at that stage, rather than buying an expensive diffuser before you have controlled the first-reflection smear that is destroying your imaging.
Step-by-step, here is the order I recommend, validated by measurements in my own room and the rooms of several friends I have helped treat:
- First reflection side wall points: Two 1200×600×100mm broadband absorbers, one per side wall, at the mirror-trick locations. This alone transforms imaging. If your budget is exactly enough for two panels, spend it here.
- Ceiling first reflection: One 1200×600mm panel above the listening position. Less dramatic than the side walls but audible, especially for orchestral and live recordings with real height information.
- Front wall (behind speakers): If your speakers are less than 1 meter from the front wall, absorption or diffusion behind them cleans up the lower midrange. I run two 100mm panels behind my speakers, centered on the midpoint between the tweeter and the wall.
- Corner bass traps: Floor-to-ceiling in all four vertical corners if possible, or at minimum the two front corners. 200-300mm depth with air gap. This is the treatment that makes bass lines coherent.
- Rear wall diffusion: Three to five diffuser panels at ear height behind the listening position, combined with broadband absorption below and between them.
- Fine-tuning: Additional absorption at secondary reflection points, membrane traps for stubborn modes, or more rear-wall treatment to dial in the decay time to your preference.
At step 4 in my own room, my RT60 was 0.28 seconds from 500 Hz to 2 kHz, and the ETC (energy time curve) showed all early reflections at least 15 dB below the direct sound within the first 20 milliseconds. That is the transition point where a room stops sounding like a room and starts sounding like the recording. It is achievable in a typical residential room with about €400 in materials and a weekend of work.
Treatment Type Comparison
| Feature | Broadband Absorption | Diffusion | Bass Trapping |
|---|---|---|---|
| Primary purpose | Reduce mid/high reflections, lower RT60 | Scatter reflections, preserve ambience | Reduce low-frequency standing waves and modal ringing |
| Effective range | 250 Hz – 10 kHz (100mm + air gap) | 850 Hz – 8 kHz (200mm deep QRD) | 40 Hz – 250 Hz (porous + pressure) |
| Best placement | First reflection points, front wall | Rear wall, ceiling between speakers and listener | Room corners, wall-ceiling junctions |
| Typical cost per panel | €20-40 DIY / €80-150 commercial | €40-80 DIY / €150-300 commercial | €30-80 DIY / €100-250 commercial |
| DIY difficulty | Low — frame, fill, wrap, mount | High — precise cuts, varying depths | Medium — thick construction, sealing |
| Risk of overdoing it | High — too much = dead, lifeless room | Low — scatters energy, increases sense of space | Low — modal decay is rarely too short |
Frequently Asked Questions
How many acoustic panels do I need for a small room?
Start with four panels: two at the first reflection points on the side walls and one on the ceiling above the listening position. A fourth behind the speakers if they are within 1 meter of the front wall. This setup reduces the most damaging early reflections and costs about €120-200 in DIY materials, delivering roughly 80% of the audible benefit of a full treatment setup.
Can I use egg cartons or blankets for room treatment?
No. Egg cartons are thin cardboard — they reflect sound almost identically to bare wall. Thick blankets provide some high-frequency absorption above 2 kHz but do nothing below that, creating an unbalanced room that sounds dull but still suffers from uncontrolled midrange reflections. Proper broadband absorbers using mineral wool or fiberglass panels 100mm thick with an air gap are the minimum effective treatment.
Should I treat the entire room or just the reflection points?
Treating only the first reflection points provides about 80% of the audible benefit of full room treatment. Covering every surface leads to an overdamped, unpleasant listening environment with RT60 below 0.2 seconds — recordings need some room contribution to sound natural. Aim for RT60 of 0.25-0.35 seconds in the midrange, which typically requires treating 20-30% of the total wall and ceiling area.
What is the difference between RT60 and early decay time?
RT60 measures the time for sound to decay by 60 dB across the full reverberant tail, while early decay time (EDT) measures the decay of the first 10 dB, which correlates more closely with perceived clarity and imaging precision. EDT is what you actually hear as ‘the room sound.’ In small rooms below 50 cubic meters, EDT is a more relevant metric because a true diffuse reverberant field does not develop below the Schroeder frequency, typically 150-250 Hz.
Can I fix bass problems with an equalizer instead of bass traps?
Partially, but not completely. Parametric EQ can reduce peaks caused by room modes because peaks are minimum-phase — cutting the electrical signal reduces the acoustic output linearly. But nulls are non-minimum-phase — adding more power at a null frequency simply adds more energy that cancels itself, creating no audible improvement. Bass traps address the root cause by absorbing modal energy, reducing both peaks and nulls. Use EQ to trim remaining peaks after trapping, not as a substitute.