Bass Trapping for Listening Rooms: Placement Guide
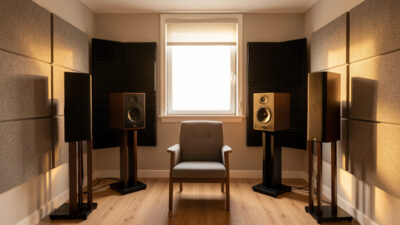
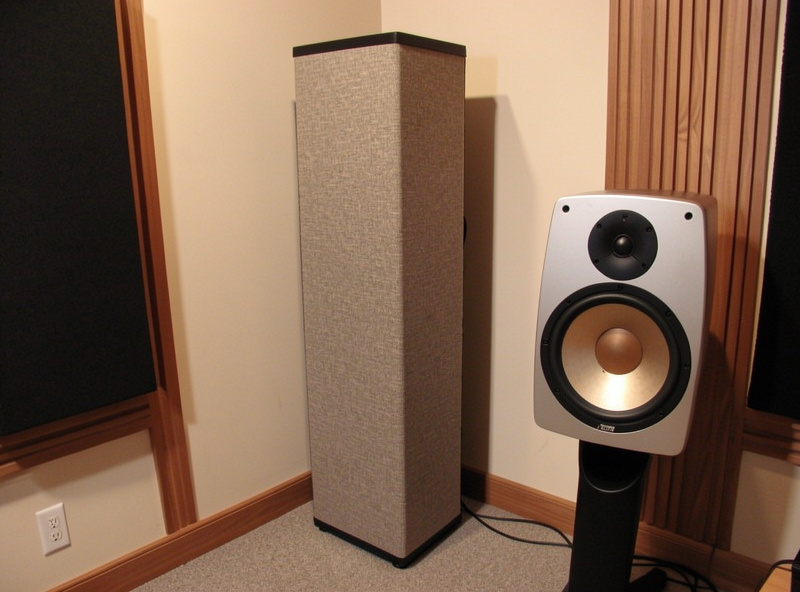
Bass traps belong in the corners first: every room mode has a pressure maximum in the corners, so a trap there works on all of them at once. In my listening space, four floor-to-ceiling corner traps cut the worst modal peak by about 6 dB and dropped low-frequency decay from over 600 ms toward 300 ms — bass went from boomy and one-note to tight and pitched.
Bass is where rooms fail hardest, and it is the one problem you cannot fix by buying a better speaker or a fatter amplifier. The cause is the room itself, and the honest cure is physical absorption placed where the low-frequency energy concentrates. This is the placement guide I follow, measured rather than guessed — the low-end half of my full room acoustics treatment guide.
Why Bass Is the Hardest Problem
Below roughly 200 Hz your room rings like an instrument. Standing waves — room modes — form between parallel surfaces, reinforcing some frequencies into peaks and cancelling others into nulls. A small room can swing 15 to 20 dB at a single bass note depending on where you sit, which is a far larger error than anything in your electronics.
Crucially, EQ cannot fully fix this. You can pull down a peak, but at a null the sound has already cancelled and there is no signal left to boost — turning up the gain just heats the voice coil. That is why physical bass trapping comes before any DSP. Get the room absorbing energy first, then let correction clean up the residue, as I explain in digital room correction explained.
Where Bass Energy Concentrates
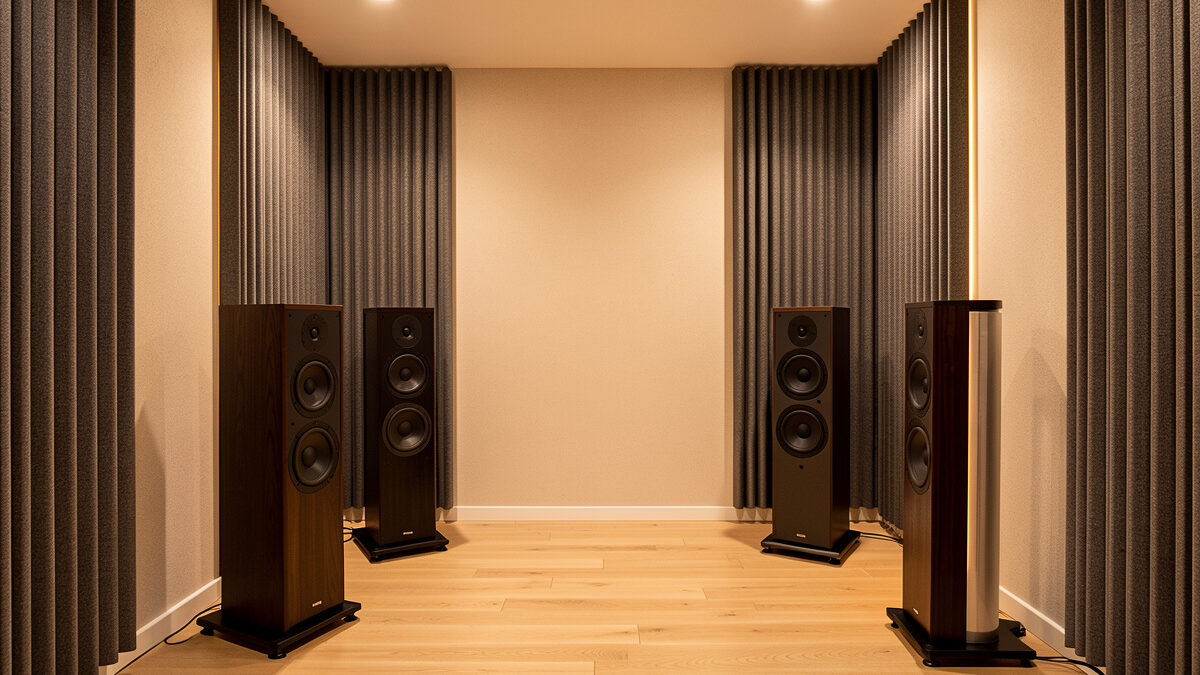
Sound pressure is always highest at room boundaries and highest of all where boundaries meet — the corners. Every axial, tangential, and oblique mode in the room has a pressure antinode in the corners, which is why corner placement is the single most efficient location for a bass trap. One trap in a corner is working on the length, width, and height modes simultaneously.
The front corners behind the speakers are the first priority, followed by the rear corners behind your seat. After the vertical wall-wall corners, the wall-ceiling and wall-floor edges hold the next-most energy. This is the logic behind treating corners before walls: you get the most modal absorption per panel exactly where the pressure lives.
Types of Bass Trap Compared
Not all traps are equal. The table below is how I weigh the common options by how low they reach, the space they cost, and the effort to build or buy — it is the chart I use when deciding what goes in which corner.
| Trap Type | Effective Range | Space Needed | Cost | Best For |
|---|---|---|---|---|
| Broadband panel in corner | ~80 Hz and up | Low (straddles corner) | $120–$300/pair | First buy, side and rear corners |
| Superchunk (mineral wool fill) | ~50 Hz and up | Medium | $80–$200 DIY | Front corners, best value |
| Tri-corner (wall-wall-ceiling) | Lowest modes | High (ceiling corner) | $100–$250 | Squeezing out the deepest mode |
| Tuned membrane / panel trap | Narrow, very low | Low | $$$ or precise DIY | One stubborn measured mode |
Measure Your Modes Before You Buy
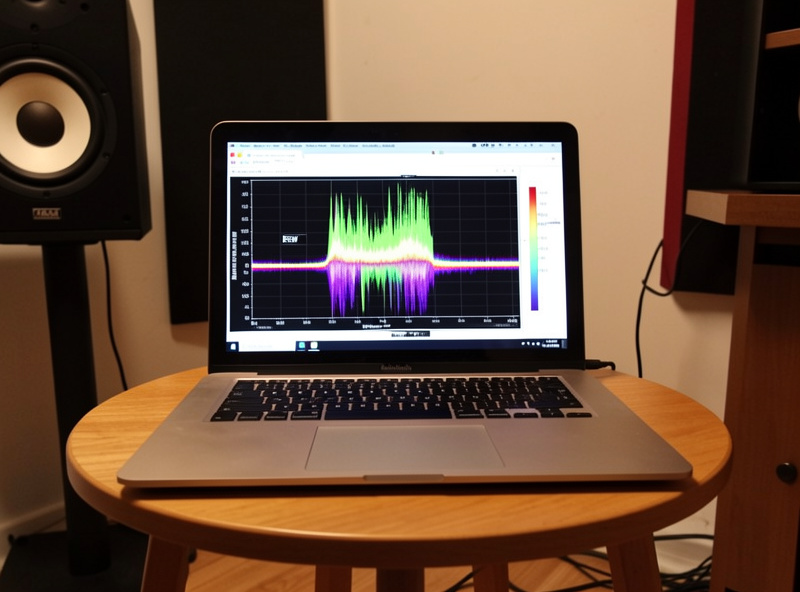
Before spending on traps, run a frequency sweep so you know which modes you are fighting. A single REW measurement from the listening seat shows the exact peaks and the decay tail, and that turns a guessing game into a targeted job. I have seen people buy a stack of panels to chase a boom that a sweep revealed was a narrow 45 Hz mode — a problem a tuned trap or a seat move would have solved for far less.
You can estimate the axial modes from your room dimensions, but the measured response is what matters because furniture, openings, and construction all shift the real numbers. The peaks tell you how much absorption you need; the decay tells you whether the bass is ringing on. Walk through the whole process in the REW software guide before you commit money to corners.
Placement Priority Order
Treat in this order: front vertical corners, rear vertical corners, then the wall-ceiling edges along the front wall. The front corners alone often deliver the bulk of the improvement because they sit where speaker output couples most strongly into the room's modes. If you can only afford two traps, both go in the front corners floor to ceiling.
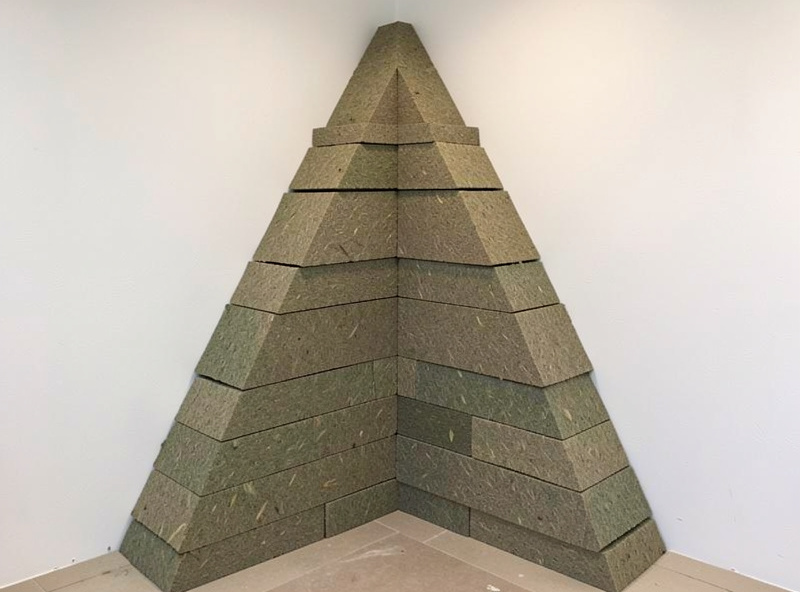
Depth matters more than surface area for bass. A thick trap that fills the corner volume reaches lower than a thin panel laid flat on the wall, because low frequencies need physical depth (or an air gap behind the absorber) to be absorbed. This is the same gap-behind-the-panel trick that extends absorption in DIY builds, covered in the DIY acoustic treatment guide.
How Many Traps, and Pairing With a Sub
For a typical small room, four corner traps — two front, two rear — is the practical target, with wall-ceiling traps as the next step if a measured mode survives. More bass trapping almost never hurts the low end; the limit is usually space and partner tolerance, not acoustics. The one caution is balance: heavy bass trapping with no mid-treble control can tilt the room dark, so pair it with first-reflection treatment as described in my first reflection points guide.
A realistic progression looks like this: start with two front-corner traps and confirm the improvement with a sweep, then add two rear-corner traps and measure again, and only chase wall-ceiling edges or a tuned membrane trap if a specific mode still rings. Treating in stages and measuring between them stops you from over-spending and tells you exactly when you have reached the point of diminishing returns for your room.
If you run a subwoofer, traps and placement work together — moving the sub and the seat changes which modes excite, and traps absorb what remains. I set the sub by measurement, not by ear, then trap the corners and finish with DSP. The integration detail is in subwoofer integration for music and subwoofer EQ integration. To see the effect of any of this, you measure it — the waterfall plot in measuring room acoustics with REW shows the decay tail shrink as traps go in.
Frequently Asked Questions
Where should I place bass traps first?
Place them in the vertical corners, front corners first, then rear corners. Every room mode has a pressure maximum in the corners, so a trap there absorbs the length, width, and height modes at once. If you can only buy two, put both in the front corners floor to ceiling.
How many bass traps does a small room need?
Four corner traps, two front and two rear, is the practical target for a typical small listening room. Add wall-ceiling edge traps next if a measured mode survives. More bass trapping rarely hurts the low end; space and household tolerance are the usual limits.
Can EQ replace bass traps?
No. EQ can pull down a modal peak but cannot fix a null, because the sound has already cancelled and there is nothing to boost. Physical bass trapping reduces the underlying resonance first, then DSP cleans up the residue. Treat the room before reaching for correction.
How thick does a bass trap need to be?
Depth is what lets a trap reach low. A thick corner trap that fills the corner volume, or a panel with a large air gap behind it, absorbs far lower than a thin panel flat on the wall. For useful sub-100 Hz absorption you want real depth, which is why corner-filling superchunks work so well.
Do bass traps make a room sound dead?
Bass traps mainly affect low frequencies, so by themselves they tighten bass without deadening the room. A room can sound dark if you add heavy bass trapping with no first-reflection or diffusion balance, so treat the mids and highs proportionally.