Room Acoustics Treatment: The Complete Guide for Better Sound
Room acoustics treatment is the single highest-value upgrade in any hi-fi system: in my listening space, fixing first reflections and corner bass with roughly $250 of absorption did more for imaging and bass clarity than a $1,500 DAC swap ever did. The room is the component nobody sells you, and it colours everything downstream of the speaker.
I run a modest separates system in a small, lightly treated room in Sweden, and I sweep it with a calibrated UMIK-1 mic into REW before I trust anything my ears tell me. This guide is the order of operations I actually follow — what to treat first, how much it costs, and where measurement settles arguments that listening alone never will. It is the hub for a cluster of deeper guides on first reflections, bass trapping, diffusion, DIY panels, measurement, and doing the whole thing on a budget.
Why the Room Beats the Box
Below about 300 Hz, your room — not your speakers — decides what you hear. Room modes can swing the in-room response by 15–20 dB at a single bass note, which is a larger error than any difference between two competently designed amplifiers. No cable, DAC, or power conditioner touches that.
The physics is unforgiving and it is also liberating, because it means the biggest wins are cheap. A pair of broadband absorbers at the first reflection points and bass traps in the corners cost a fraction of a component upgrade and change the sound far more. When I swept my room before treatment, the decay time at 80–120 Hz was over 600 ms — bass notes were literally smearing into each other. After corner traps that dropped toward 300 ms, and the difference on a kick drum was not subtle. This is the whole argument of speaker and room acoustics: the box matters far less than the space it plays into.
Understanding Room Modes and the Schroeder Frequency
Room modes are standing waves: a bass frequency whose wavelength fits the distance between two parallel walls reinforces itself, creating a pressure peak at the boundaries and a cancellation null in between. A typical small room has its lowest mode somewhere between 30 and 60 Hz, and the spacing of the modes above it determines how lumpy the bass sounds. This is why two listeners with identical speakers in different rooms hear completely different bass.
The Schroeder frequency is the dividing line that organises the whole treatment strategy. Below it — usually 150 to 250 Hz in a domestic room — the room behaves modally and you hear discrete resonances, so the cure is physical bass absorption and, for the residue, DSP. Above it the room behaves statistically, with thousands of overlapping reflections, and the cure is broadband absorption and diffusion rather than EQ. I keep that line in my head constantly: it tells me which tool fixes which problem. A useful rule of thumb is that the more bass trapping you install, the lower and gentler your modal peaks become, which is exactly why the corners get treated before anything fancy goes on the walls.
You can calculate your room's axial modes from its dimensions, but I would rather measure them. A single REW sweep shows the real peaks and nulls in your actual room with your actual furniture, which never matches the idealised calculator. That measured reality is the map the rest of the treatment follows.
Room Layout and Symmetry
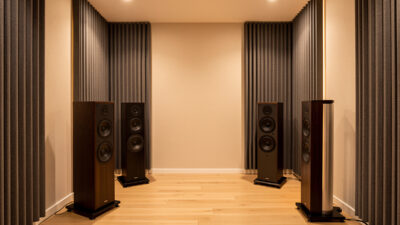
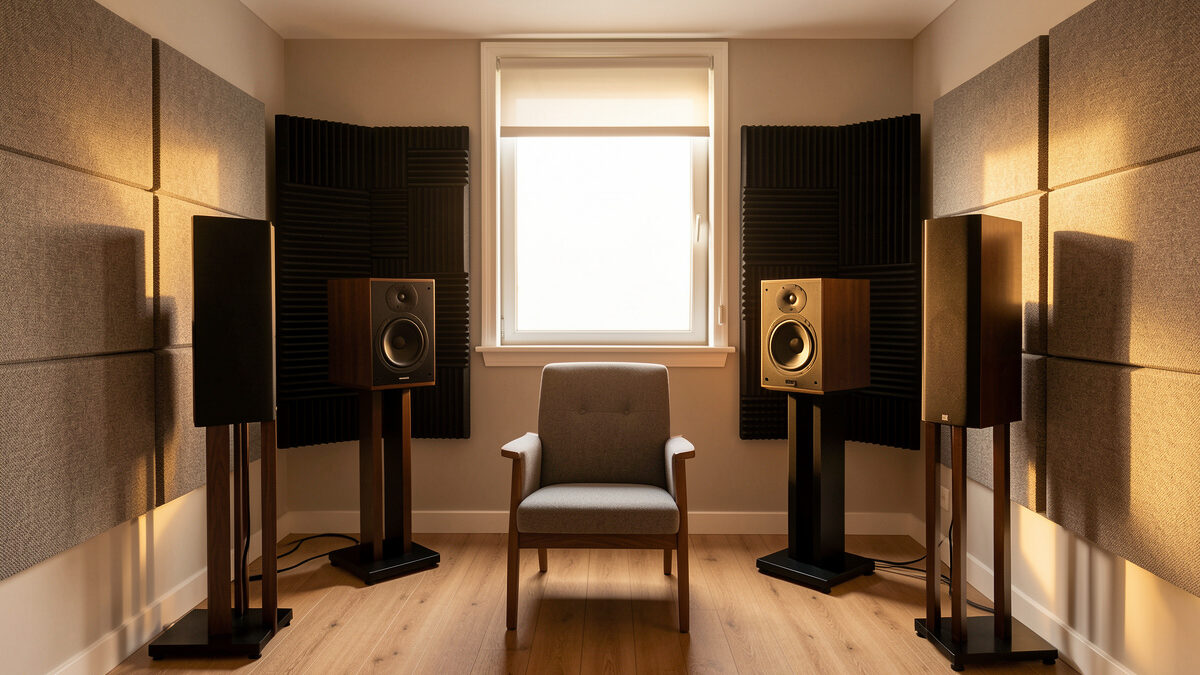
Left-right symmetry is the foundation everything else sits on. If your left speaker fires down an open hallway and your right speaker sits against a bookshelf, no panel on earth will give you a centred image, because the two channels are arriving with different reflection signatures. Before I hang a single absorber I make the two side walls as acoustically similar as the room allows, even if that means rearranging furniture.
The speakers should ideally fire down the length of the room rather than across it, which pushes the front-to-back mode lower and gives bass more room to develop. Keep the listening seat off the exact centre of the room and away from the rear wall, because the dead centre and the boundaries are where modal nulls and peaks are worst. These are free moves, and they shrink the problems your panels have to solve. The compact-room version of this thinking is in my near-field listening setup.
The Correct Order of Operations
Treat the room in the order the physics rewards: speaker placement first (free), then first reflections, then bass, then diffusion last. Most people do this backwards — they buy diffusers and exotic panels before they have moved a speaker six inches. Get the sequence right and each step compounds.
Placement is the free upgrade. Pulling the speakers off the front wall, setting an equilateral triangle, and dialling toe-in fixes problems before you spend a krona. The detail of that lives in my speaker placement guide and, for compact rooms, the near-field listening setup. Only once the triangle is set do reflections and modes become the next bottleneck.
Here is the order I follow, every time, in every room I have set up:
- 1. Speaker and seat placement — free, and it moves modal peaks and nulls more than people expect.
- 2. First reflection absorption — side walls, ceiling, sometimes the floor. Tightens imaging immediately.
- 3. Bass trapping — corners first, then wall-ceiling edges. The slowest decay lives here.
- 4. Diffusion — the rear wall, last, to keep the room from sounding dead.
- 5. DSP room correction — only for what physics cannot fix below the Schroeder frequency.
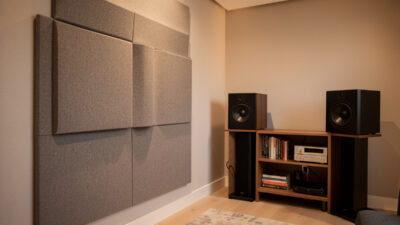
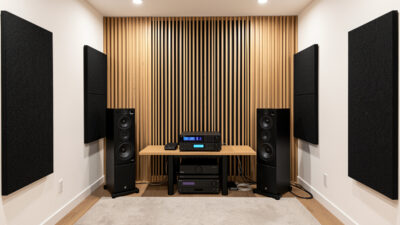
First Reflections: The Cheapest Imaging Upgrade
The first reflection points are where sound bounces off your side walls and ceiling and arrives at your ears a few milliseconds after the direct sound, smearing the stereo image. Absorb those points and the soundstage snaps into focus — instruments stop sounding like they are stuck to the speaker cabinets and start occupying defined positions between them.
Finding them is the mirror trick: have someone slide a mirror along the side wall while you sit in your chair, and wherever you can see a tweeter in the mirror, that is a point to treat. A 60×120 cm broadband absorber at each side-wall point and a ceiling cloud between speakers and seat is the entire fix. This is the first thing I hang in any new room, and the full method — including why a thin foam tile does nothing — is in my first reflection points treatment guide.
Do not forget the floor and ceiling. The ceiling reflection is as strong as the side-wall one and is the single most overlooked point in domestic rooms, which is why a ceiling cloud earns its place early. The floor bounce is usually handled by a thick rug with an underlay between the speakers and the seat — the cheapest acoustic treatment in the house, and one most listening rooms already own. Get all four early reflections under control and the centre image stops wandering when you move your head.
Bass Trapping: Taming the Low End
Bass is where rooms fail hardest and where treatment is least optional. Room modes — standing waves between parallel surfaces — create peaks and nulls that no EQ can fully fix, because at a null the energy has already cancelled and there is nothing left to boost. The honest fix is physical absorption in the corners, where bass pressure is highest.
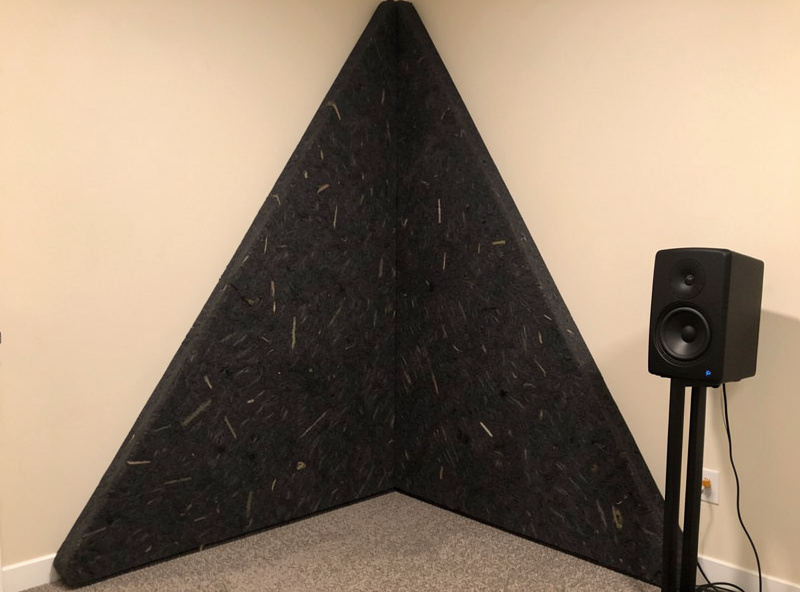
Corners are the priority because every room mode has a pressure maximum there, so a trap in a corner works on all of them at once. Floor-to-ceiling broadband traps in the front corners are the highest-leverage bass treatment you can install, and tri-corner (wall-wall-ceiling) traps add more. In my room, four corner traps cut the worst modal peak by about 6 dB and shortened low-frequency decay dramatically. Placement matters as much as quantity — the specifics are in my bass trap placement guide, and for sub owners it pairs with subwoofer integration for music.
Diffusion vs Absorption: Knowing What Each Does
Absorption removes reflected energy; diffusion scatters it. Treat a room with absorption alone and it goes dead and lifeless — the air leaves the music. The skill is balance: absorb the early reflections that smear imaging, diffuse the later reflections that add a sense of space, and never deaden the whole room.
In a small room I lean heavily toward absorption, because there usually is not enough distance for a diffuser to work properly — you need a few feet between the diffuser and your ears for the scattered wavefront to develop. Where I do use diffusion, it goes on the rear wall behind the listening seat. The full trade-off, including the minimum-distance rule that catches most people out, is in diffusion vs absorption in room acoustics.
A diffuser is a structured surface — a quadratic-residue well array, or even a well-stocked, irregular bookshelf — that scatters an incoming wavefront in many directions instead of bouncing it straight back. The point is to break up a strong specular reflection without removing the energy, so the room keeps its sense of life and depth. In my space the rear wall does this job; the bookshelf behind my seat is doing real acoustic work, not just holding records. That said, in a genuinely small room I treat diffusion as a refinement, not a priority — absorption and placement do the heavy lifting first.
Treatment Types Compared
Different problems need different tools. The table below is how I think about which treatment to reach for, what it costs, and where it goes — it is the quick reference I wish I had when I started spending money on the wrong things.
| Treatment | Targets | Best Location | Rough Cost (pair/unit) | Priority |
|---|---|---|---|---|
| Broadband panel absorber | First reflections, 250 Hz and up | Side walls, ceiling cloud | $60–$160 | First |
| Corner bass trap | Room modes, 40–200 Hz | Front and rear corners | $120–$300 | Second |
| Tri-corner / superchunk trap | Lowest modes, sub-80 Hz | Wall-wall-ceiling corners | $80–$200 DIY | Second |
| Quadratic diffuser | Late reflections, liveliness | Rear wall, ≥2 m from ears | $150–$400 | Last |
| DSP room correction | Residual modal peaks below Schroeder | In the signal chain | $200–$400 (miniDSP) | After physical |
DIY vs Bought Panels
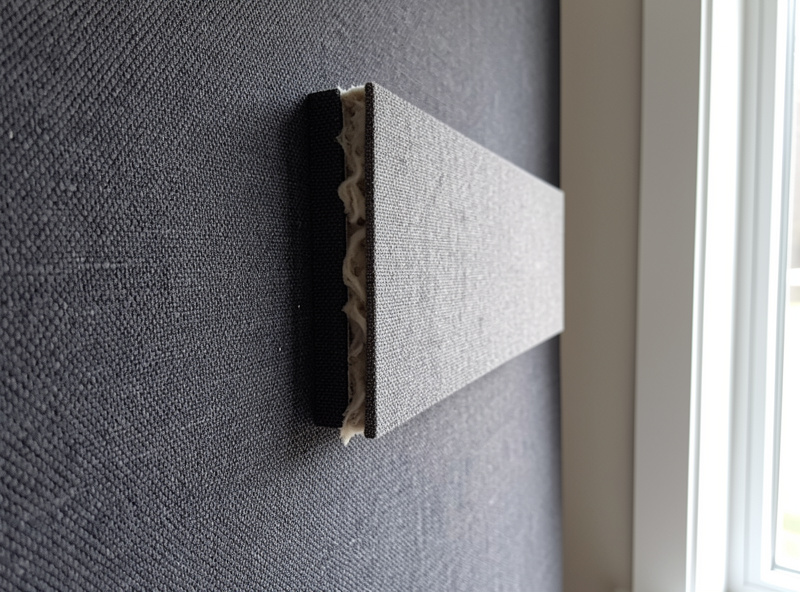
A bought broadband panel and a DIY one built from the same density mineral wool perform identically — the physics does not care who stapled the fabric. DIY runs roughly 40–60% cheaper, and for the price of two retail panels you can usually treat the whole room. The only thing you are paying retail for is the finish and the hour you save.
The recipe is simple: a timber frame, 50–100 mm of mineral wool at around 45–60 kg/m³ (Rockwool or equivalent), and acoustically transparent fabric stretched over the front. I have built most of my own panels this way. The full cut list, density choice, and the gap-behind-the-panel trick that extends low-frequency absorption are in my DIY acoustic treatment guide, and if budget is the constraint, start with acoustic treatment on a budget.
Measure, Do Not Guess
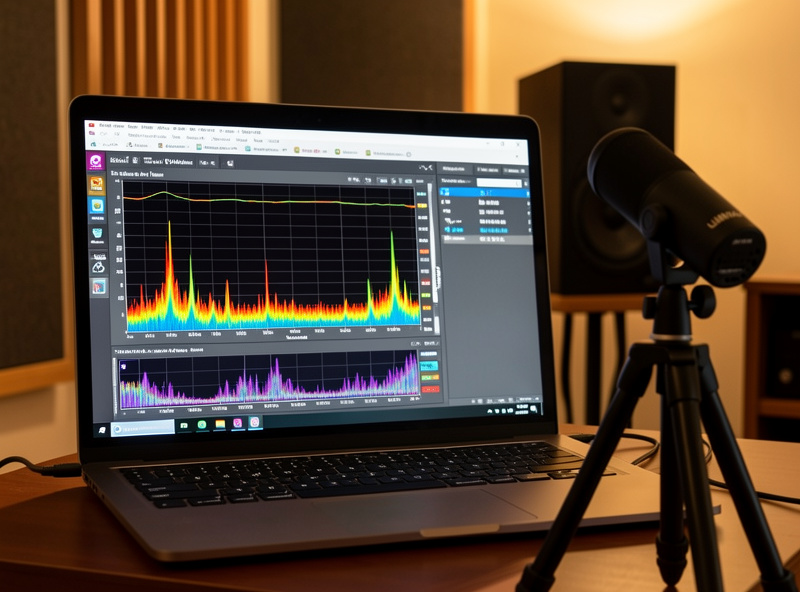
You cannot treat what you cannot see, and the ear is a terrible spectrum analyser below 200 Hz. A $130 UMIK-1 mic and free REW software turn guesswork into a graph — you sweep the room, read the decay and modal response, and know exactly where the problems are before you spend on panels.
I measure before treatment, after each change, and again at the end. The frequency-response sweep shows modal peaks; the waterfall plot shows which frequencies ring on too long. Watching a 600 ms decay tail shrink after corner traps is far more convincing than any reviewer adjective. The complete workflow — mic setup, sweep, reading the waterfall, and setting RT60 targets — is in measuring room acoustics with REW, building on the basics in the REW software guide.
Where DSP Fits — and Where It Does Not
DSP room correction is the final 10%, not the foundation. Below the Schroeder frequency (typically 150–250 Hz in a domestic room) DSP can usefully flatten a modal peak that physical treatment did not fully kill. Above it, correcting the steady-state response with EQ often does more harm than good, because you are chasing reflections that change with every head movement.
I run a miniDSP Flex for exactly this: tame the two or three residual bass peaks, leave the midrange and treble to the speakers and the room. The rule is physical treatment first, DSP for what physics leaves behind — never DSP as a substitute for a corner trap. The how is covered in digital room correction explained and the hardware in the miniDSP 2×4 HD setup guide, with general EQ principles in the home audio equalizer guide and room correction basics.
Common Treatment Mistakes I See
The most expensive mistake is treating the room with thin acoustic foam. The egg-crate foam sold as a room kit is typically 25–50 mm thick, which only absorbs above roughly 500 Hz — it does nothing for the bass and lower midrange where the real problems live, and it makes the room sound dull and bright at the same time. Foam is not bass treatment; it is barely treatment at all.
The second mistake is over-damping. People hang absorption everywhere, kill every reflection, and end up with a room that sounds like a recording booth — flat, airless, fatiguing. The target is a controlled room, not a dead one. I aim to absorb the early reflections and the corner bass and then stop, leaving the rear wall lively or diffused.
The third is buying before measuring. I have watched people spend a small fortune on panels placed by guesswork, only to find a sweep shows the worst peak was a mode their treatment never touched. And the fourth is reaching for DSP first: room correction is a finishing tool, not a substitute for a corner trap. Get the physical room right, then let DSP clean up the last few decibels.
What It Costs to Treat a Real Room
A genuinely effective small-room treatment runs $250–$600 done with DIY panels, or $600–$1,200 with quality bought units. That buys two first-reflection absorbers, a ceiling cloud, four corner bass traps, and a measurement mic — enough to transform the room. Compare that to the cost of the component upgrade most people reach for instead.
If you want a single starter kit to measure and build your own panels, a calibrated mic plus mineral wool and fabric is the highest-return audio purchase I can name. As an Amazon Associate I earn from qualifying purchases. A good entry point is a calibrated USB measurement microphone, which is the one tool that pays for itself before you spend a cent on panels.
Frequently Asked Questions
What should I treat first in my listening room?
Start with speaker and seat placement (free), then first reflection points on the side walls and ceiling, then bass traps in the corners, and diffusion last. Placement and first reflections give the biggest audible gain for zero or low cost before you spend on bass treatment.
How much does room acoustic treatment cost?
An effective small-room treatment runs about $250 to $600 with DIY panels or $600 to $1,200 with quality bought units. That covers first-reflection absorbers, a ceiling cloud, four corner bass traps, and a measurement mic, which transforms the sound more than most component upgrades.
Can DSP room correction replace physical treatment?
No. DSP can flatten residual modal peaks below roughly 150 to 250 Hz, but it cannot fix a null where energy has already cancelled, and correcting reflections above the Schroeder frequency often makes things worse. Treat physically first, then use DSP for what remains.
Do I need to measure my room before treating it?
Strongly recommended. A calibrated UMIK-1 mic and free REW software cost around $130 total and show you exactly where modal peaks and long decay times are, so you treat the real problems instead of guessing. Measure before, during, and after treatment.
Will too much absorption make my room sound dead?
Yes, if you only absorb. Use absorption at the early reflection points and corners, but keep some reflective or diffusive surfaces, especially on the rear wall, so the room retains a sense of space. Balance absorption and diffusion rather than deadening everything.
Are DIY acoustic panels as good as bought ones?
Yes, when built from the same density mineral wool. Acoustic absorption depends on material and thickness, not the brand label, so a properly built DIY panel performs identically to a retail one at roughly 40 to 60 percent of the cost.