How to Build a Speaker Cabinet That Doesn’t Color the Sound
A speaker cabinet has one acoustic job and one cosmetic job: hold the right internal volume without adding any sound of its own, then look like furniture. The first is engineering, the second is patience. The thing most first builds get wrong is treating the box as a container rather than as part of the acoustic system — an unbraced 19 mm MDF panel resonates audibly, and that resonance lands on top of the music as boxy coloration you can measure and hear.
I build and measure cabinets the same way I treat everything in my listening room: the goal is a box that contributes nothing, so what you hear is the drivers and the crossover, not the walls. This guide covers materials, internal volume, bracing, the panel cuts, joinery, and ports — the structural half of the project. The driver and crossover decisions that set the volume target live in the DIY speaker building guide and the driver selection guide; read those first, because the cabinet’s internal volume is dictated by the woofer you chose.
Choosing the Material
The cabinet material matters far less than builders imagine, provided it’s dense and you brace it properly. The job is a stiff, dead, dimensionally stable wall — not an exotic tonewood. Three materials cover almost every home build, and the choice is mostly about cost, weight, and how much you enjoy woodworking.
| Material | Pros | Cons | Best for |
|---|---|---|---|
| MDF (18–19 mm) | Dense, cheap, dimensionally stable, machines cleanly, no grain to chip | Heavy, hates moisture, thirsty edges need sealing, dust is nasty | The default first-build choice |
| Baltic birch plywood | Lighter, stronger, attractive edge, takes screws well | More expensive, voids possible in cheap stock, more careful edge work | Builders wanting lighter, stronger cabinets |
| Solid wood | Beautiful | Moves and cracks with humidity; bad as a primary panel material | Trim and accents only, not the box itself |
For a first cabinet, use 18–19 mm MDF. It’s dense, predictable, cheap, and forgiving to machine, and it’s what the vast majority of proven designs specify their internal volumes around. The one rule with MDF: wear a proper respirator when cutting and routing it, because the dust is genuinely unpleasant. Baltic birch is a fine upgrade once you’ve built one box and know what you’re doing.
Getting the Internal Volume Right
The internal air volume is the single most important dimension in the whole cabinet, because it sets the bass alignment you modeled from the woofer’s Thiele–Small parameters. If your design calls for a 12-liter sealed enclosure, the net internal volume — after subtracting the space taken by bracing, the driver baskets, and the port tube — needs to land close to 12 liters, not your rough outside-dimension guess. A box that ends up 30% too small will have peaky, lean bass no amount of EQ fully corrects.
Model the box first in free software like WinISD before cutting anything, then add a little internal volume on paper to account for the bracing and driver displacement you’ll subtract back. Panel thickness, internal bracing volume, and the port all eat into the gross volume, so I always build to the net target and verify by checking the tuning with a near-field measurement once the box is sealed. The relationship between volume, alignment, and the bass you actually get is covered in the main build guide; here the point is simply: measure twice, because the volume is not negotiable after the glue is dry.
Bracing: The Part That Actually Kills Coloration
This is where cheap cabinets and good ones diverge. A large flat panel of MDF flexes when the woofer pressurizes the box, and that flexing radiates sound — a resonance you’ll see as a spike in a panel measurement and hear as a hollow, boxy signature. Bracing stiffens the panels so they don’t move, pushing any residual resonance up in frequency and down in amplitude where it’s inaudible. It’s the highest-value half-hour of work in the whole build.
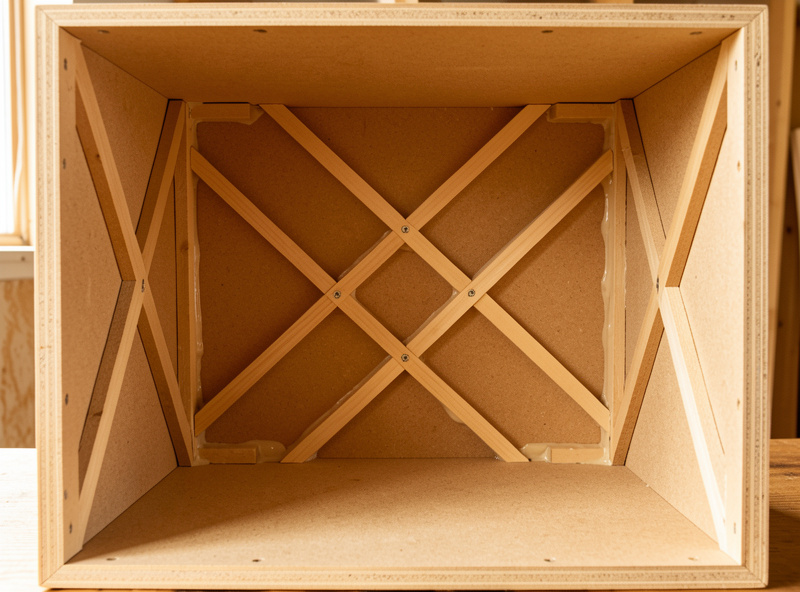
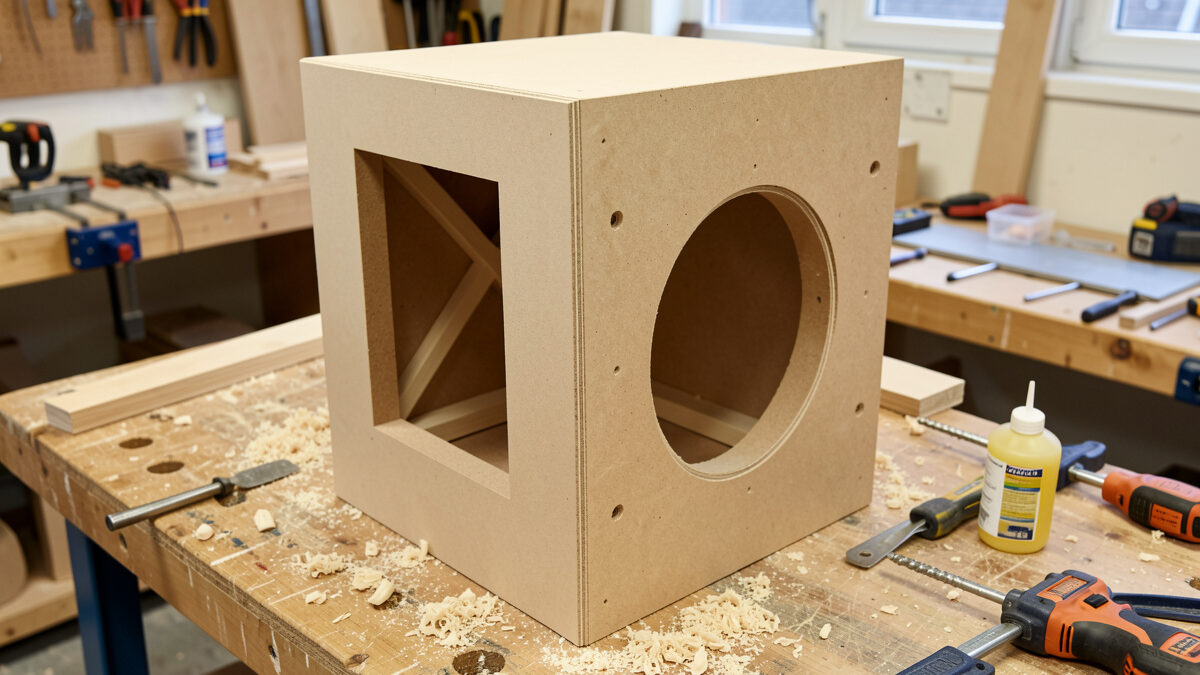
A simple, effective scheme for a bookshelf is a single window brace or a couple of cross-braces tying opposing panels together near their centers, where flexing is greatest. Larger floorstanders benefit from a brace matrix or shelf braces. You don’t need to fill the box with wood — over-bracing adds weight and eats volume for diminishing returns — you need to break up the large unsupported spans. A knuckle-rap test tells you a lot: a well-braced cabinet sounds dead and high-pitched, an unbraced one sounds like a drum. I confirm it with a panel measurement, but the knuckle test gets you most of the way.
Cutting and Joining the Panels
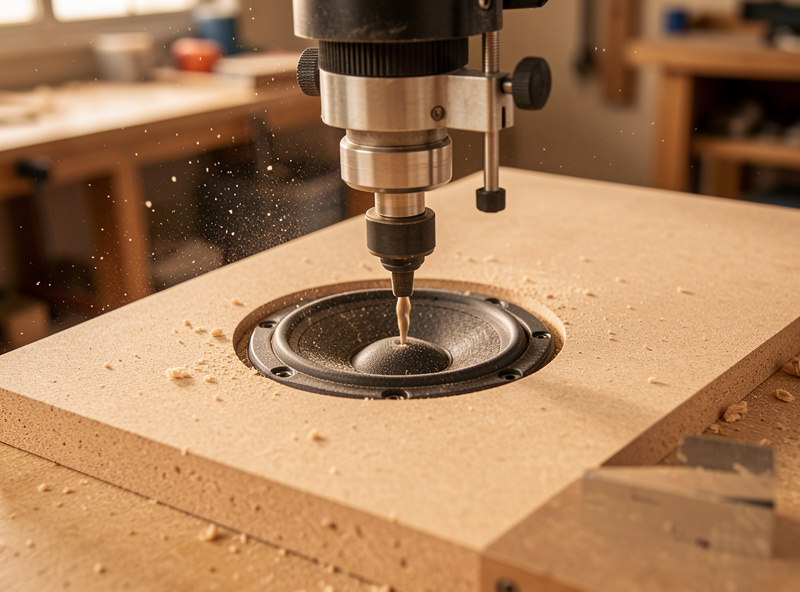
Square, accurate cuts are what make a cabinet airtight and good-looking, and they’re worth getting help with. A circular saw with a guide rail, a table saw, or a panel saw at the hardware store all produce the straight, square panels you need; freehand cuts will fight you at glue-up. Cut the driver recesses and the rear terminal cutout with a router and a circle-cutting jig — a flush, recessed driver mount both looks finished and reduces baffle diffraction near the driver.
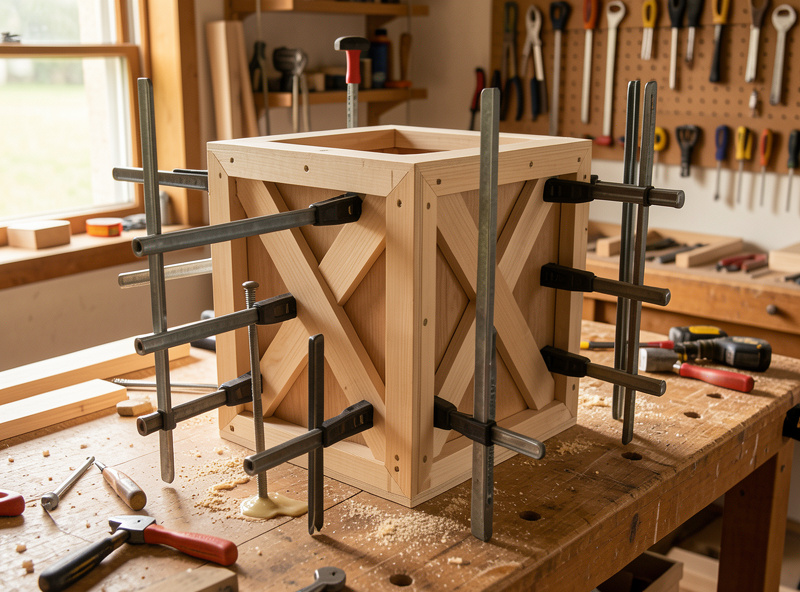
For joinery, a simple butt joint with wood glue is structurally plenty for a speaker cabinet; the glue line is stronger than the MDF itself. What matters is clamping pressure and squareness while it cures. I run a bead of glue, assemble, check square with a framing square, and clamp with bar clamps until the panels pull tight with a little squeeze-out along every seam. Rabbet or dado joints look tidier and self-align, but they’re a refinement, not a requirement. An airtight box is the non-negotiable part — any gap at a seam or around a driver gasket leaks and detunes the alignment you modeled.
Ports: Tuning the Bass Reflex
If you’re building a ported (bass reflex) design rather than a sealed one, the port is a tuned element, not a hole for looks. Its diameter and length set the box’s tuning frequency, and both come straight out of your enclosure model — change the length and you change the tuning. Use the port dimensions your design or your WinISD model specifies, mount the port where it has clearance from the rear wall and from internal bracing, and avoid making it so small in diameter that it chuffs audibly at volume. A larger-diameter port needs to be longer for the same tuning, which is the usual trade-off in a small box.
A sealed box sidesteps all of this — no port to tune or mis-fabricate — which is exactly why I steer first-time builders toward sealed two-ways. If you’re weighing the two presentations and the open-baffle alternative, I walk through the formats in open baffle vs box speakers. Whatever you choose, verify the finished tuning with a near-field measurement; a port that measures 6 Hz off its target tells you something leaked or the net volume drifted.
Before You Finish It
Once the box is built, braced, and airtight, two jobs remain before it’s a speaker: damping the interior to absorb the woofer’s back-wave and standing waves, and finishing the outside. Both have their own measurable considerations — too much stuffing over-damps a ported box, and a rushed finish is the clearest sign a speaker was home-built — and I cover them in the cabinet damping and finishing guide. And of course the cabinet exists to hold a crossover and drivers, so the wiring and filter from the crossover design guide come next. The cabinet is the foundation; build it dead, square, and airtight, and everything mounted in it gets a fair chance to sound right.
For tools, a guide-railed saw, a router with a circle jig, a generous set of bar clamps, and good wood glue cover a first build. A starter set of cabinet-building clamps and router bits is a sensible one-time purchase that pays off across every box you’ll ever build.
As an Amazon Associate I earn from qualifying purchases.
Frequently Asked Questions
What is the best material for a speaker cabinet?
For most home builds, 18 to 19 mm MDF. It is dense, dimensionally stable, cheap, and machines cleanly, and most proven designs specify their internal volumes around it. Baltic birch plywood is a lighter, stronger upgrade once you have built one box. Solid wood moves with humidity and should be used only for trim.
Why does a speaker cabinet need internal bracing?
Because a large flat panel flexes when the woofer pressurizes the box, and that flexing radiates sound as boxy coloration. Bracing stiffens the panels so they do not move, pushing any residual resonance up in frequency and down in level where it is inaudible. A knuckle-rap should sound dead and high-pitched, not like a drum.
How accurate does the internal volume need to be?
Close to your design’s net target after subtracting bracing, driver baskets, and the port. The internal air volume sets the bass alignment from the woofer’s Thiele-Small parameters, so a box that ends up significantly undersized will have peaky, lean bass that EQ cannot fully fix. Build to the net volume and verify tuning with a near-field measurement.
Do I need fancy joinery for a speaker cabinet?
No. A simple butt joint with wood glue is structurally plenty – the glue line is stronger than the MDF. What matters is square, accurate panels, firm clamping while the glue cures, and an airtight box. Rabbet or dado joints look tidier and self-align, but they are a refinement, not a requirement.
How do I tune a ported speaker cabinet?
The port’s diameter and length set the tuning frequency, and both come from your enclosure model. Use the dimensions your design specifies, give the port clearance from the rear wall and bracing, and keep it large enough not to chuff at volume. Verify the finished tuning with a near-field measurement; a sealed box avoids port tuning entirely.