Desktop Audio Setup Guide: Build a Real Near-Field Rig
A desktop audio setup is the most cost-effective hi-fi you will ever build, because the listening distance does half the work for you. At roughly 70–90 cm from your ears, a near-field rig hears the speakers far more than the room, which means a modest DAC, a clean amp, and well-placed monitors can outperform a system three times the price sitting across a living room. The order that matters is placement first, source second, cables almost never.
I run a measurement-grade desktop chain on my bench in Sweden — an RME ADI-2 feeding either a pair of active monitors or a small passive stack — and I have swept the desk with a UMIK-1 enough times to know where the money actually goes. This guide is the map for the whole desktop cluster: how the signal flows, what each box does, where audible differences are real, and where you are about to spend money on nothing. Every section links out to the deep-dive that covers it properly.
What a Desktop Audio Setup Actually Is
A desktop audio setup is a near-field listening system built at a computer: a source (your PC), a digital-to-analog converter, amplification, and speakers or headphones placed within about a metre of your head. The defining feature is distance — you sit close enough that the direct sound from the speakers arrives long before the room’s reflections, so the room contributes far less coloration than it would in a normal stereo setup.
That single fact reshapes every buying decision. In my main listening space the room is the dominant component and I spend on treatment before electronics. On the desk, the equilateral triangle between my two ears and the two speakers is so short that first reflections off the desk surface and the wall behind the monitor become the main problems, and they are cheap to fix. A desktop rig is where a careful beginner gets the bulk of high-end sound for a fraction of the outlay, provided they respect the chain in the right order.
The Desktop Signal Chain, Box by Box
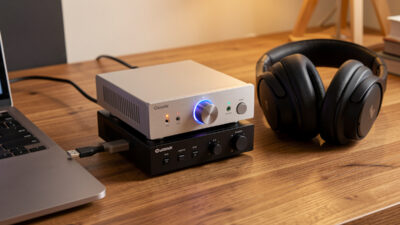
Every desktop system is the same four stages in series: source, DAC, amplification, transducer. Understanding what each one does — and does not do — is how you stop overspending on the wrong link. On my bench the chain is PC over USB into the RME ADI-2, then either its built-in amp to headphones or a line-out to powered monitors. That is the whole thing.
The source is your computer. Bit-perfect playback over USB sounds identical whether it comes from a budget laptop or a dedicated streamer; the bits are the bits. The DAC converts those bits to an analog voltage, and at any competent baseline modern DACs measure so far below the threshold of audibility that the box rarely changes the sound. Amplification is where matching matters — you need enough clean power for your speakers’ sensitivity and impedance, or your headphones’ drive requirements. The transducer — speaker or headphone — is the one stage where differences are large, measurable, and worth obsessing over. That is the part you actually hear.
Where to spend, where to save
Spend on the transducer and the placement. Save on the source and, within reason, the DAC. A budget DAC like an SMSL or Schiit unit and a strong pair of monitors will embarrass a flagship DAC driving cheap speakers, every single time. I have run the RME against budget converters on the same monitors in level-matched comparisons and the gap is far smaller than the price difference suggests — the speakers and the room set the ceiling.
Active Monitors or a Passive Stack?
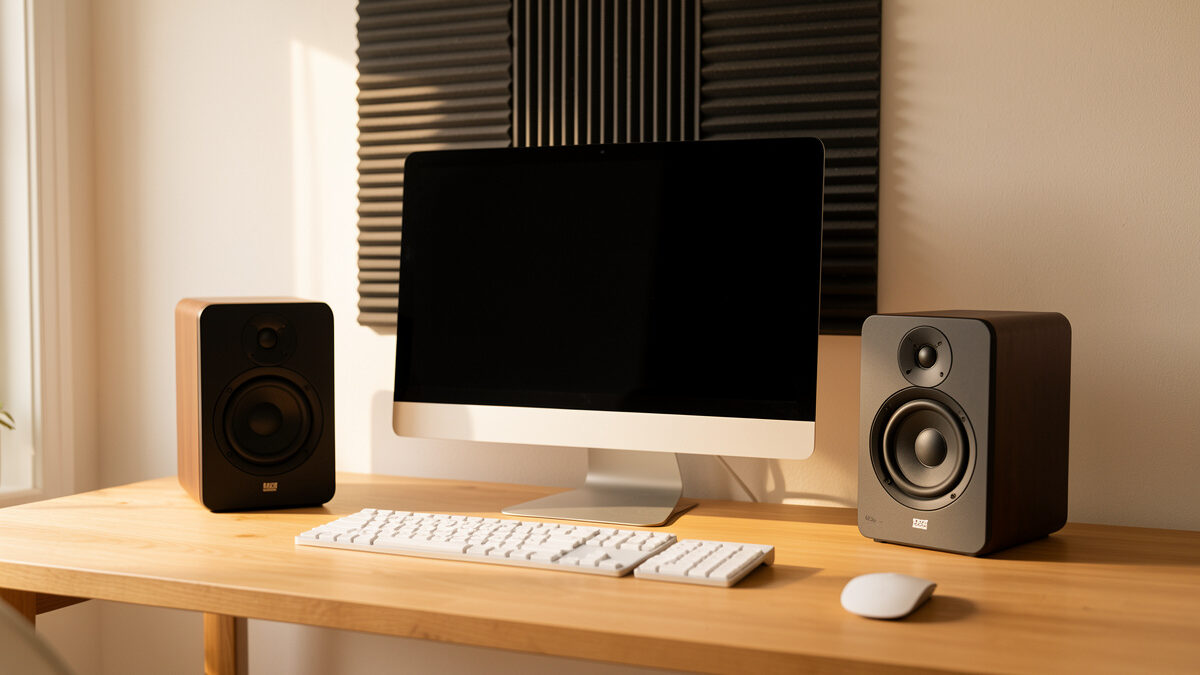
The first real fork in a desktop build is whether you buy active (powered) speakers with the amplifier built in, or passive speakers plus a separate amp. For most desks I recommend active monitors: the amplifier is matched to the driver at the factory, the crossover is active and precise, and you eliminate an entire box and its cabling. My Genelec 8030s and Neumann KH 120s are active for exactly this reason — on a desk, fewer variables is better sound for less fuss.
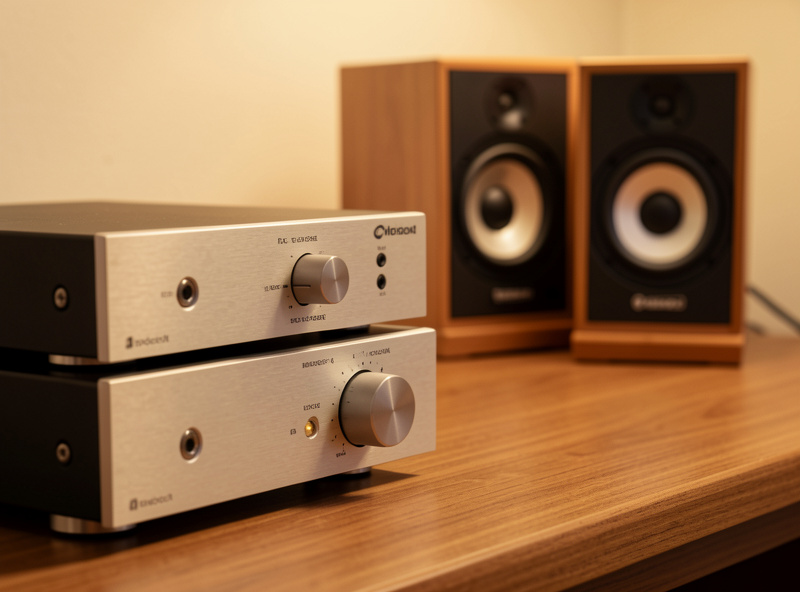
A passive stack — a pair of KEF LS50 Meta or Q Acoustics bookshelves driven by a small integrated — can sound superb and gives you an upgrade path, but it costs more, takes more space, and asks you to match amplifier power to speaker sensitivity correctly. Neither is wrong. The decision turns on space, budget, and whether you enjoy tinkering. I cover the full trade-off in the powered vs passive desktop speakers deep-dive, and the broader version in the powered vs passive speakers guide.
| Setup type | Boxes needed | Best for | Typical entry cost | Main trade-off |
|---|---|---|---|---|
| Active monitors | DAC + 2 monitors | Most desks, small rooms | $400–900 | No amp upgrade path |
| Passive stack | DAC + amp + 2 speakers | Tinkerers, future upgrades | $700–1,500 | More space, matching needed |
| Headphone rig | DAC/amp + headphones | Shared spaces, late nights | $300–800 | No soundstage off the head |
| All-in-one DAC/amp + actives | One box + 2 monitors | Clean, minimal desks | $500–1,000 | Less flexibility |
The DAC: Real Differences vs Audiophile Myth
A DAC’s job is conversion, and at the price of a decent desktop unit that job is essentially solved. SINAD — signal-to-noise-and-distortion — on competent modern converters sits so far below audibility that swapping one transparent DAC for another rarely changes what you hear in a level-matched test. The RME ADI-2 on my bench is my reference not because it sounds “warmer” than a Topping D90, but because its measurements are immaculate and its volume control and EQ are genuinely useful.
What a DAC does change on a desk is features: a good headphone amp built in, a remote, a hardware volume knob, parametric EQ, balanced outputs if your monitors take XLR. Buy the DAC for what it adds to your workflow, not for a tonal character the measurements say is not there. If you want the full method for choosing one, the DAC buying guide and the best DAC by budget picks lay it out, and the desktop-specific stack is in the best DAC and amp stack for desktop.
USB DAC vs the soundcard you already have
The most common desktop question is whether an external USB DAC beats the audio output already on your motherboard. Usually yes, but not for the reason people think. Onboard audio is not inherently low-fidelity in its numbers; it is just sitting inside an electrically noisy computer, picking up interference from the GPU and power rails, often with a weak headphone output. Moving conversion outside the case to a USB DAC sidesteps that noise floor and gives you a proper amp. I break the whole comparison down in USB DAC vs soundcard, including when a soundcard is actually the smarter buy.
Amplification and Matching
If you go passive, the amplifier is where careful matching earns its keep. Two numbers decide everything: speaker sensitivity (how loud the speaker plays per watt) and impedance (the electrical load it presents). A sensitive 88 dB bookshelf in a near-field setup needs only a handful of clean watts to reach realistic desktop levels, because you are sitting a metre away, not across a hall. More watts is almost never the upgrade people imagine it to be.
This is the single most over-bought spec in audio. I have driven my passive bookshelves to satisfying near-field volume on amplifiers rated for a fraction of what forum wisdom claims you “need.” The full method — reading a sensitivity figure, matching it to room size and distance, and leaving sane headroom — is in the speaker sensitivity and amplifier matching guide. For headphones the equivalent is impedance and drive, covered in how to match headphone impedance.
Speakers: The Part You Actually Hear
Everything upstream is plumbing; the speaker is the instrument. This is where measurable differences are large — frequency response, dispersion, distortion at level — and where audiophile spending finally correlates with what you hear. For a desk I want a speaker designed for near-field use, with a wide, even dispersion so the off-axis sound stays consistent as you move your head, and a cabinet small enough not to crowd the listening triangle.
My benchmarks are the KEF LS50 Meta for passive imaging and the Genelec 8030 / Neumann KH 120 for active. They throw a precise soundstage at a metre’s distance, which is exactly what a desk demands. Choosing among the field — what to prioritise, what marketing to ignore — is the job of the best desktop speakers for audiophiles guide, with a wider bookshelf field in best bookshelf speakers under $300.
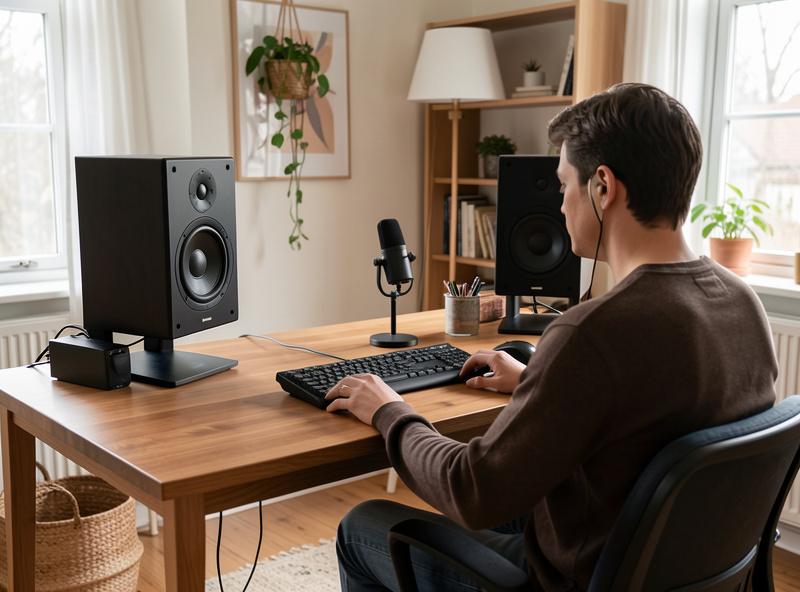
Near-Field Placement: The Free Upgrade
Placement is the cheapest, largest improvement on any desk, and the one most people skip. Build an equilateral triangle: the two speakers and your head form three corners of equal length, typically 0.7–1.1 m on a side. Toe the speakers in so the tweeters aim at your ears, get the tweeter to ear height, and decouple the speakers from the desk with foam pads or stands so the desk surface stops vibrating along with them.
The desk itself is a giant reflector. The sound bouncing off the surface between you and the speakers arrives a fraction of a second after the direct sound and smears the imaging — tilting the speakers up slightly or adding a small absorber on the desk in front of them tightens everything up. The full desktop method, including how short to make the triangle and how to handle the wall behind the monitor, is in the near-field desktop listening setup guide, and the general small-room version is in near-field listening setup. The broader principles live in the room acoustics treatment guide and the speaker placement guide.
Cables: Where the Snake Oil Lives
At a desktop, cables need to be the correct type, the correct length, and well made. That is the entire requirement. A USB cable that meets spec carries the same bits as a cable costing fifty times more; an analog interconnect needs to be adequately shielded and correctly gauged, not exotic. I have compared ordinary and boutique cables on my bench and heard nothing the measurements did not already explain, which is to say nothing.
What does matter on a desk is getting the right connector for the job — balanced XLR or TRS to active monitors to reject noise over a run near a computer, a proper USB-C or USB-B cable to the DAC, RCA where the gear only offers single-ended. Choosing correctly is a real skill; paying for “directional” copper is not. The practical version is in the desktop audio cable guide, and the wider argument in do expensive audio cables make a difference.
Measuring and Correcting the Desk
Once the rig is built, a calibrated mic tells you the truth the brochure will not. I sweep the desk with a UMIK-1 in REW, look at the frequency response and the decay, and fix the worst problems below the Schroeder frequency with the parametric EQ in the RME or a miniDSP Flex. On a desk the usual culprits are a bass bump from the wall and desk loading, and a suckout from the desk reflection — both visible in a sweep, both fixable in minutes.
You do not need to correct everything; you need to tame the room modes and leave the direct sound alone. The method — what to fix below roughly 300 Hz and what to leave to placement — is in the REW measurement guide, the digital room correction explainer, and the miniDSP setup guide. For headphone-only desks, software EQ does the same job — see EQ for headphones.
Headphones as a Desktop System
If you share a space or listen late, a headphone rig is a complete desktop system on its own and often the best value of all — a DAC/amp and a good pair of open-backs sidesteps the room entirely. My HD 600-series and HiFiMan Sundara run off the RME’s headphone stage or a discrete desktop amp, and at the desk that combination gives reference sound with zero placement headaches. The trade-off is the soundstage lives inside your head rather than out in front of you.
Matching the amp to the headphone’s impedance and sensitivity is the only technical step, and it is the same matching logic as speakers. The headphone path is covered in the headphone buying guide, headphone amps under $300, and best headphone amp and DAC combos.
The Source and Streaming on a Desk
The computer is your source, and on a desk it is the part people overthink the most. Bit-perfect playback over USB is bit-perfect regardless of the machine, so a quiet, well-configured PC is all the transport you need — there is no audible reward for a thousand-dollar “audiophile” streamer feeding a desktop DAC. What does help is keeping the playback software out of the operating system mixer’s way: exclusive mode (WASAPI or ASIO on Windows, the equivalent on macOS or Linux) hands the DAC the unaltered stream and bypasses the resampling that a shared mixer can impose.
If you want your whole library on tap, a Roon setup running on a small NUC turns the desk into one endpoint among many, and a WiiM or Bluesound Node makes a tidy network bridge if you would rather keep the noisy computer out of the chain entirely. I run Roon as the library brain and treat the desktop DAC as just another endpoint — the convenience is real, the fidelity gain over a clean USB feed is not. The full picture of when a separate streamer earns its place is in the network audio streaming guide and streaming DAC vs separate streamer. Spend the streamer money on the speakers instead and your desk will thank you.
A Sane Build Order
If you are starting from a laptop and earbuds, here is the order I would spend in. First, speakers or headphones — the transducer sets the ceiling. Second, placement and a couple of cheap absorbers — free or nearly so, and the biggest jump after the transducer. Third, a DAC/amp that does conversion cleanly and adds the features you want. Last, and only if a sweep shows a problem, DSP correction for the bass. Cables come along for the ride at the correct spec and no more.
Follow that order and a few hundred dollars buys a desk that genuinely competes with systems costing far more, because the near-field geometry is doing the heavy lifting for free. Invert the order — flagship DAC, exotic cables, cheap speakers in the wrong spot — and you will have spent a fortune to hear the room and the boxes you neglected.
As an Amazon Associate I earn from qualifying purchases. When a component genuinely helps, I link a search so you can compare current options — for a desk-friendly start, a pair of powered desktop monitors and a USB DAC with headphone amp cover most builds.
Frequently Asked Questions
Do I need a separate DAC for a desktop audio setup?
Usually yes, but for noise reasons rather than sound quality. Onboard motherboard audio sits in an electrically noisy computer and often has a weak amp. An external USB DAC moves conversion outside the case and adds proper amplification, which is an audible upgrade on most PCs.
Are active monitors or passive speakers better for a desk?
Active monitors are the better default for most desks. The amplifier is factory-matched to the driver, the crossover is active, and you remove an entire box and its cabling. Passive stacks sound excellent too but cost more, take more space, and require correct amp-to-speaker matching.
How far should desktop speakers be from my ears?
Build an equilateral triangle of roughly 0.7 to 1.1 metres per side, with the two speakers and your head at the three corners. Toe the tweeters toward your ears and get them to ear height. The short distance is why a near-field desk beats far pricier living-room systems.
Does an expensive DAC make a desktop setup sound better?
Rarely. At the price of a competent desktop DAC, conversion is essentially a solved problem and SINAD sits below audibility. Buy a DAC for its features such as a built-in headphone amp, EQ, a remote, or balanced outputs, not for a tonal character the measurements do not show.
What should I spend my money on first?
The transducer first, the speaker or headphone, because it sets the ceiling and is the part you actually hear. Then placement and a couple of cheap absorbers. Then a clean DAC and amp. DSP correction last, only if a measurement sweep reveals a bass problem worth fixing.
Do I need special audio cables on a desktop?
No. Cables need to be the correct type, correct length, and well made, nothing more. A spec-compliant USB cable carries identical bits to a boutique one, and analog interconnects only need adequate shielding and gauge. Spend on the right connector type, never on exotic materials.